
To enter data in the respective fields in the Application Policy Profile section, refer the table below.
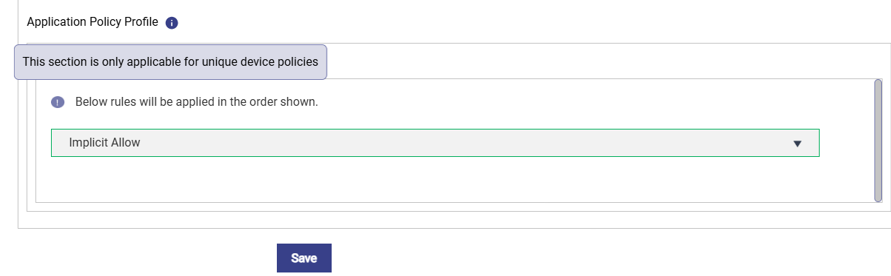
Note: Hover the cursor on the i icon to view the note - This section is only applicable for unique device policies.
|
New Rule |
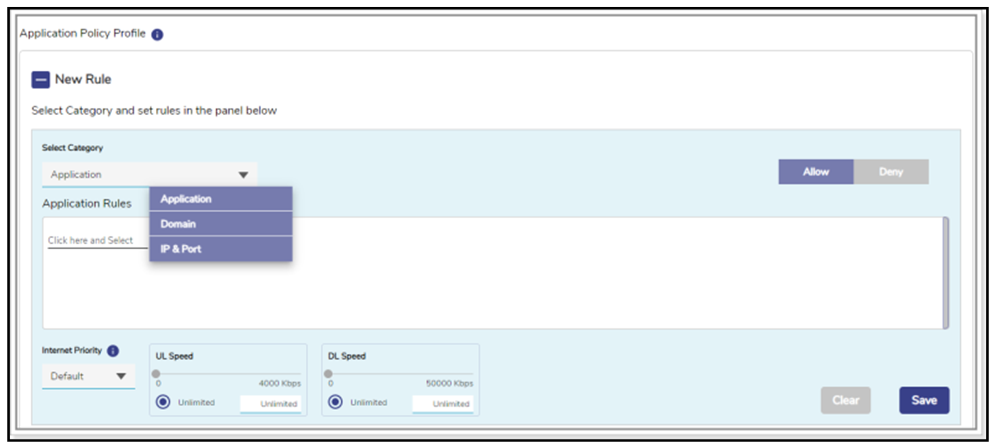
To create a new rule, click New Rule. The Category, Application and Internet Priority fields become available. |
|
Select Category |
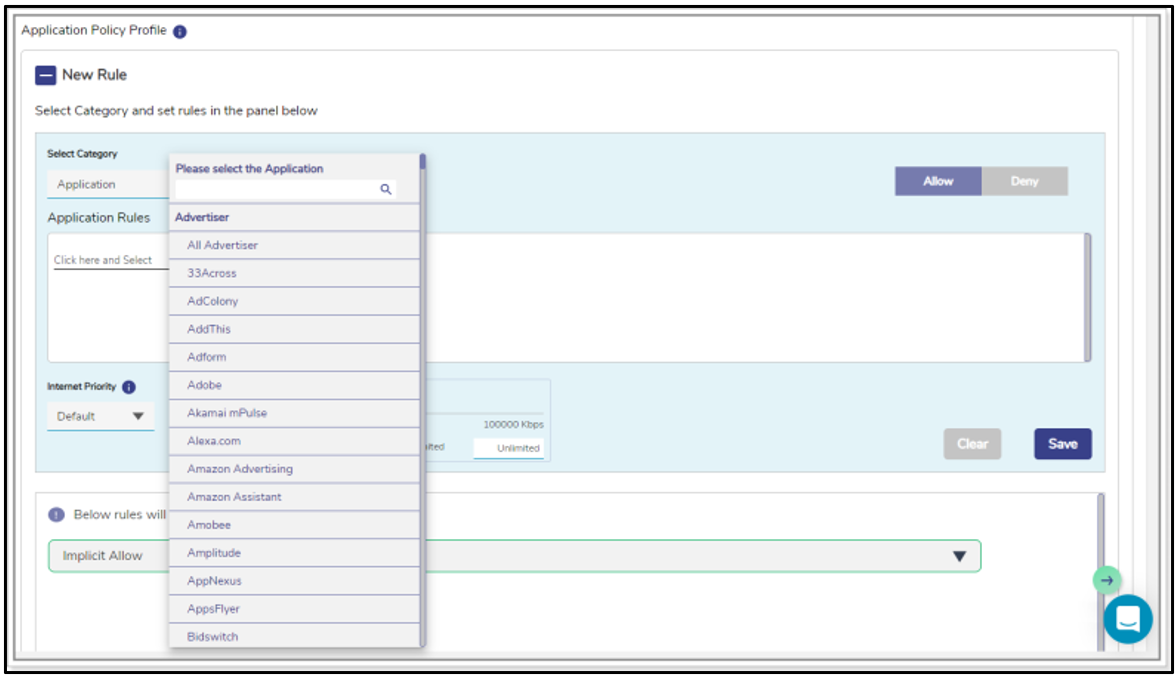
Click a category, see Figure Category List. By default, the Application category is selected. Therefore, the Application Rules field becomes available, see Figure Applications List. Or, |
|
|
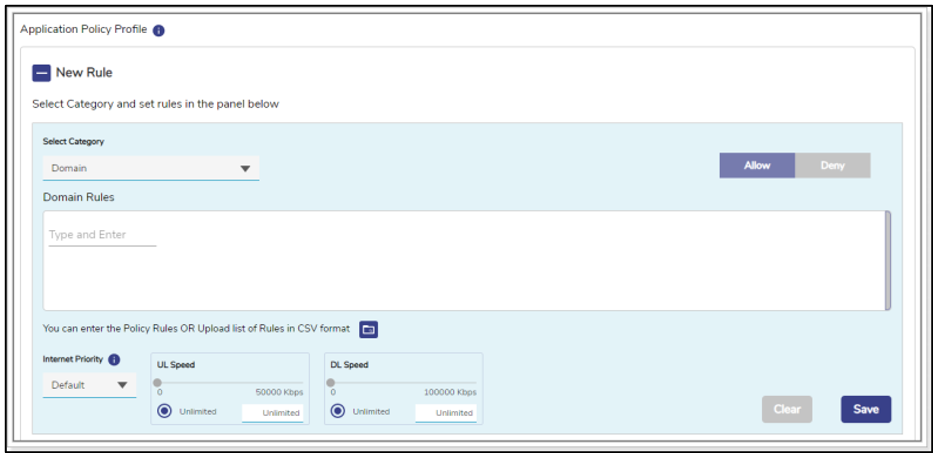
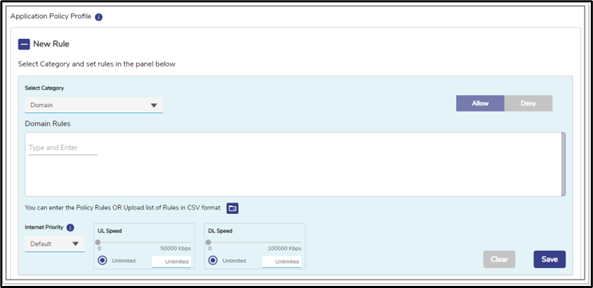
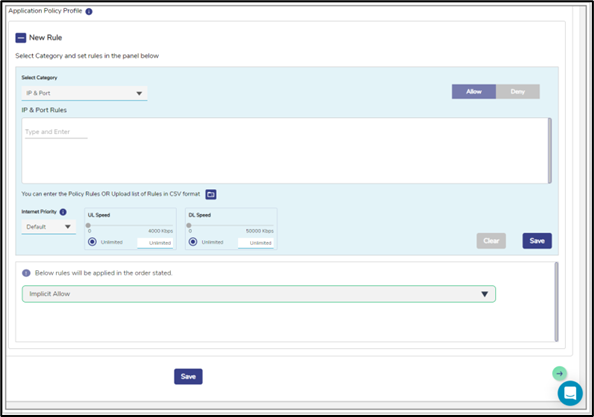
If the user selects the Domain category, then the Domain Rules field becomes available, see Figure Domain Rules. Or, If user selects the IP & Port category, then the IP & Port field becomes available. In addition to this, the entire categories are by default, Allowed. Therefore, by default, Implicit Allow rule becomes available under the Application Policy Profile section. User cannot modify the Implicit Allow rule. |
|
Application Rules |
To apply or deny application rules, perform the following steps. Steps
By default, Allow is selected.
The allowed and blocked application becomes available, see Figure Application Allow or Deny. There can be a single deny and single allow rule per category or an implicit allow or an implicit deny rule. If user selects the Application Rule in the Select Category field, then the Application Rules field becomes available. |
|
Domain Rules |
To apply or deny domain rules, perform the following steps. Steps
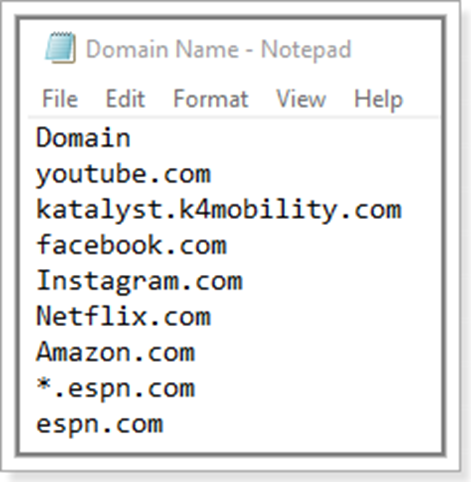
Enter the name of the domain in one of the following formats.
The user can enter multiple domain names.
By default, Allow is selected.
The allowed and blocked domain becomes available. If user selects the Domain Rule in the Select Category field, then the Domain Rules field becomes available. |
|
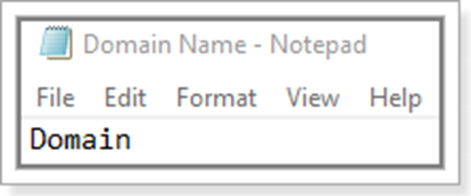
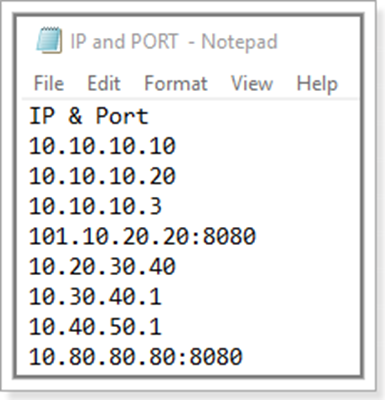
The user can also upload the rule list in CSV format. To upload the rule list in CSV format, perform the following steps. Steps
The user can create the CSV file in various text editors such as - Notepad, Microsoft Excel, and Google Docs.
The first row is referred to as the header row.
If user selects the Domain Rule in the Select Category field, then the Domain Rules field becomes available. |
|
|
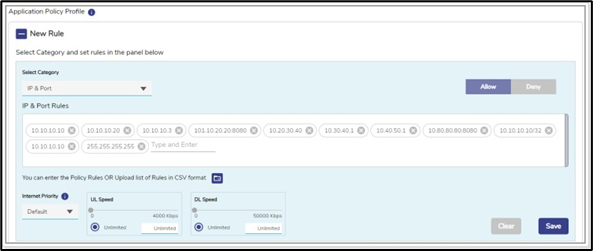
IP & Port |
To apply or deny IP and port rules, perform the following steps. Steps
Enter IP and port in one of the following formats.
Where, x is a subnet, and its value can be from 0 (zero) to 32. y and z are port numbers, and its value can be from 0 (zero) to 65535. a/b/c/d are IP, and its value can be from 0 (zero) to 255. User can enter multiple IP and ports.
By default, Allow is selected.
The allowed and blocked IP and the port become available. If user selects IP & Port in the Select Category field, then the IP & Port field becomes available. |
|
|
The user can also upload the rule list in CSV format. To upload the rule list in CSV format, perform the following steps. Steps
The user can create the CSV file in various text editors such as - Notepad, Microsoft Excel, and Google Docs.
The first row is referred to as the header row.
If user selects IP & Port in the Select Category field, then the IP & Port field becomes available. |
|
Internet Priority |
To view the details of the internet priority, point the mouse to i icon. And, In the Internet Priority list, click the internet priority. 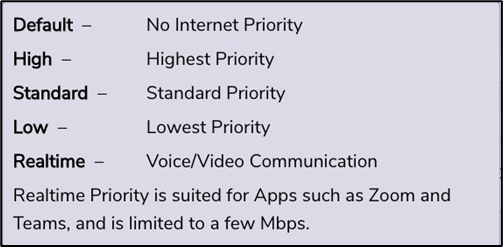
|
|
UL Speed |
By default, Unlimited is selected. This indicates that the unlimited upload speed is configured, and the Unlimited speed is displayed corresponding to the UL Speed. To configure the upload speed, move the slider to the right or click the speed. The Unlimited is cleared and the upload speed configured is displayed corresponding to the UL Speed. |
|
DL Speed |
By default, Unlimited is selected. This indicates that the unlimited download speed is configured, and the Unlimited speed is displayed corresponding to the DL Speed. To configure the download speed, move the slider to the right or click the speed. The Unlimited is cleared and the download speed configured is displayed corresponding to the DL Speed. |
|
After configuring the new rule, click Save. |
|
|
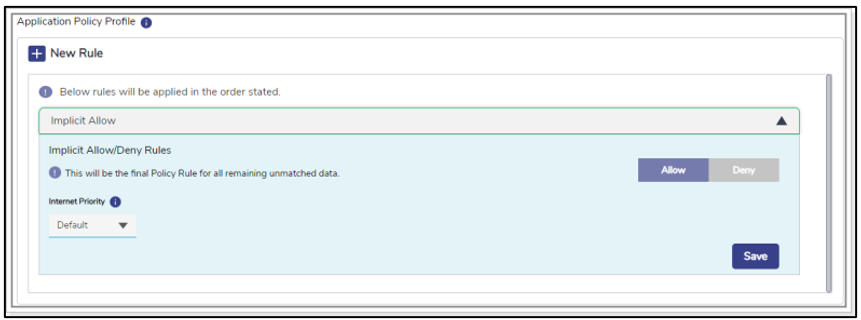
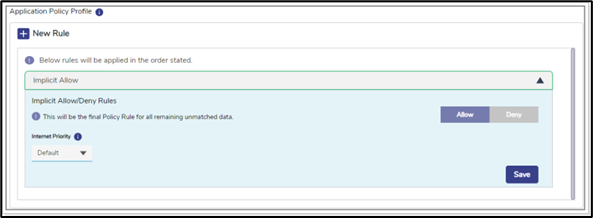
Implicit Allow/Deny Rules |
To implicitly allow the final policy, click Implicit Allow/Deny Rules, and then click Allow, Or, To implicitly Deny the final policy, click Implicit Allow/Deny Rules, and then click Deny, see Figure Application Allow or Deny. |
|
|
Internet Priority - To view the details of the internet priority, point the mouse to i icon. And, In the Internet Priority list, click the internet priority. |
|
|
After configuring the implicit allow or deny rule, click Save. |
Table Traffic Policy
-
Click Save. This will create the Network Traffic Policy.