
The user can configure the following four types of networks.
-
Connected Networks
-
Managed Connected Networks (Traditional VLANs)
-
Managed Routed Networks
-
Hub Managed Routed Networks
Adding New Connected Network
To configure the connected network, perform the following steps.
Steps
-
Select the LAN option from the side menu bar.
-
The Access Networks tab is selected by default.

Initially, the Default network is available. The user can configure multiple networks. Once the networks are configured, they become available on the Access Networks page. The page has two views, Tabular View and Expanded View. The default view is Tabular View. Click Expanded View to see the details of each network as a card, which also shows the VPN assigned to the network, see Figure Access Networks – Expanded View.
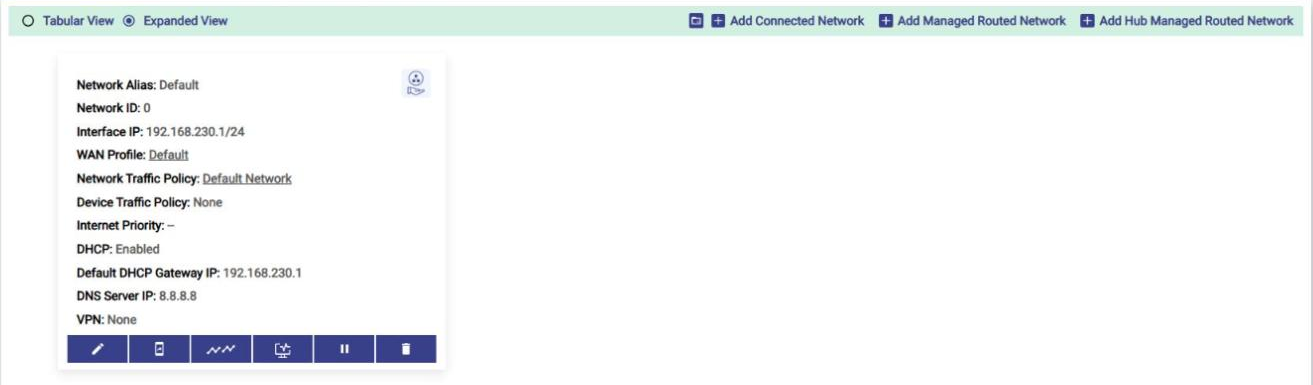
The following options are available at the top right of the page:
-
Upload Config from Backup icon – upload the Access Network configuration from a backup file.
-
Add Connected Network – add a Connected Network (unmanaged or managed).
-
Add Managed Routed Network – add a Managed Routed Network behind a Connected Network.
-
Add Hub Managed Routed Network – add the Access Network of a remote Edge device that is routed through this system (Hub).
The Tabular View displays the following columns for each network: Network Alias, Network ID, Interface IP/Subnet, Details, WAN Profile, Network Traffic Policy, Device Traffic Policy, Internet Priority, DHCP, Default DHCP Gateway IP, DNS Server IP and Actions. The icon next to the Network Alias indicates the network type (for example, Managed Connected Network).
The Actions column contains the following icons:
-
Edit Network (pencil) – modify the network, see section Modifying Network.
-
Device Profiles – view and add device profiles, see section Managing Device Profiles.
-
Network Usage Data – view the usage of the network, see section Viewing Network Usage Data.
-
LAN Monitoring – monitor devices on the network, see section LAN Monitoring.
-
Pause Network Traffic / Resume Network Traffic, see section Pausing or Resuming Network Traffic.
-
Delete Network, see section Deleting Network.
To add a Connected Access Network, perform the following steps.
Steps
-
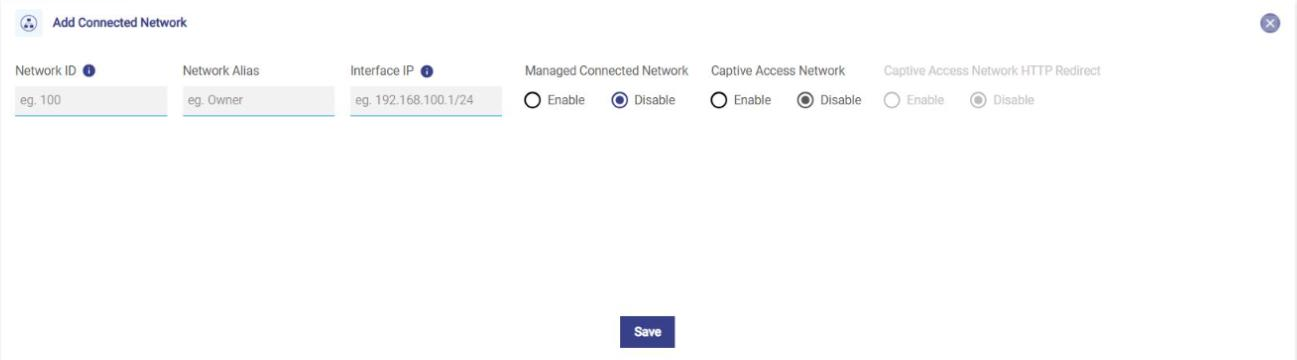
Click Add Connected Network button present on the top right of the screen. The Add Connected Network page appears, see below.
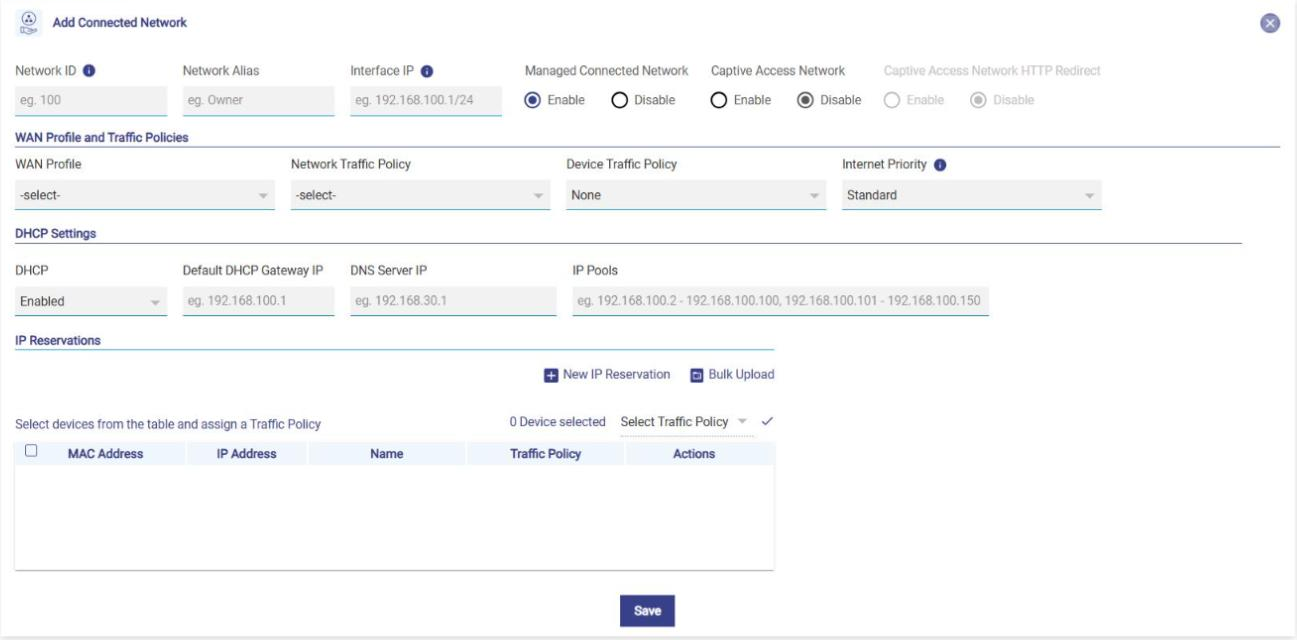
By default, Connected Networks are unmanaged, i.e., Managed Connected Network is set to Disable. See Figure Add Connected Network. To create a Managed Connected Network, set Managed Connected Network to Enable. The WAN Profile and Traffic Policies, DHCP Settings and IP Reservations sections become available. See Figure Add Managed Connected Network.
Note: The user can configure multiple local networks to be used based on the hierarchy. They can configure the local network for the crew of the site, a local network for the captain of the site, and a local network for the owner of the site distinctly.
-
To enter data in the respective fields, see table below.
|
Fields |
Description |
|
Network ID |
Enter a unique numeric ID from 2 to 4090. For details about the network ID, click i icon next to the network ID. Network ID is known as a VLAN ID. Once the network ID is configured, user cannot modify or update the VLAN ID or network ID in the future. |
|
Network Alias |
Enter a unique alias of the network. |
|
Interface IP |
Enter an interface IP address and subnet mask. |
|
Managed Connected Network |
Click one of the following options.
The Managed Connected Network is the traditional VLANs’. |
|
Captive Access Network |
Captive Portal allows for each crew member/client to have a provisioned account with an associated Service Plan. The Account’s “service plan” is customized to match corporate policy (Quota, Duration, Traffic Policy – e.g., 10GB/month with defined traffic policies). Click one of the following options.
|
|
Captive Access Network HTTP Redirect |
This option is available only when Captive Access Network is set to Enable; otherwise it is greyed out. When Captive Access Network is enabled, Captive Access Network HTTP Redirect is automatically set to Enable, see Figure Captive Access Network Configuration. Click one of the following options.
|
|
WAN Profile and Traffic Policies |
|
|
WAN Profile |
Select a WAN Profile. A single WAN Profile, I.e., Default Profile will be created in the system after the EpicOS System installation, and this profile will be assigned by default to any newly created Access Network. However, user can configure the distinct WAN profiles and assign to the Network. For details about configuring the WAN profiles, see section WAN Profiles. |
|
Network Traffic Policy |
Select a Network Traffic Policy. A single Traffic Policy, I.e., Default Network will be created in the system after the EpicOS System installation, and this policy will be assigned by default to any newly created Access Network. However, user can configure the distinct policies and assign to the Network. For details about configuring the network traffic policies, see section Traffic Policies. |
|
Device Traffic Policy |
Select a Device Traffic Policy. Initially, on Network creation, no Device Traffic Policy is assigned to the network. However, user can configure the distinct device traffic policy and assign to the network. For details about configuring the device traffic policies, see section Device Traffic Policies. If Captive Portal is enabled on the network (Captive Access Network set to Enable), the Device Traffic Policy applies to devices that are connected but have not yet logged in through the Captive Portal. Use it to apply policies such as usage quotas and speed limits before login. This is supported from EpicOS 8.1.2 Build 142. The user can assign the traffic policy to a device from also General Settings. For details, see General Settings. However, the traffic policy assigned to a device from this step will override the traffic policy of that device. 
|
|
VPN |
Select a configured VPN. |
|
|
|
|
Internet Priority |
Select an Internet Priority. For a new network, Standard is selected by default. For details, click i next to the Internet Priority, see below. 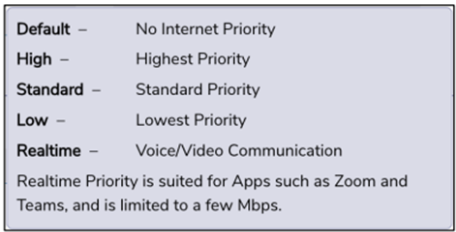
|
|
DHCP Settings |
|
|
DHCP |
The DHCP list is set to Enabled by default, so that DHCP automatically assigns the IP address and the other allied configuration details to the hosts on the network. To turn off DHCP on the network, select the disabled option in the DHCP list. |
|
Default DHCP Gateway IP |
The default IP address becomes available. User can assign a new IP address. For this, click and delete the IP address and then assign a new IP address. |
|
DNS Server IP |
The default IP address becomes available. User can assign a new IP address. For this, click and delete the IP address and then assign a new IP address. They can assign a maximum of three DNS IP addresses. |
|
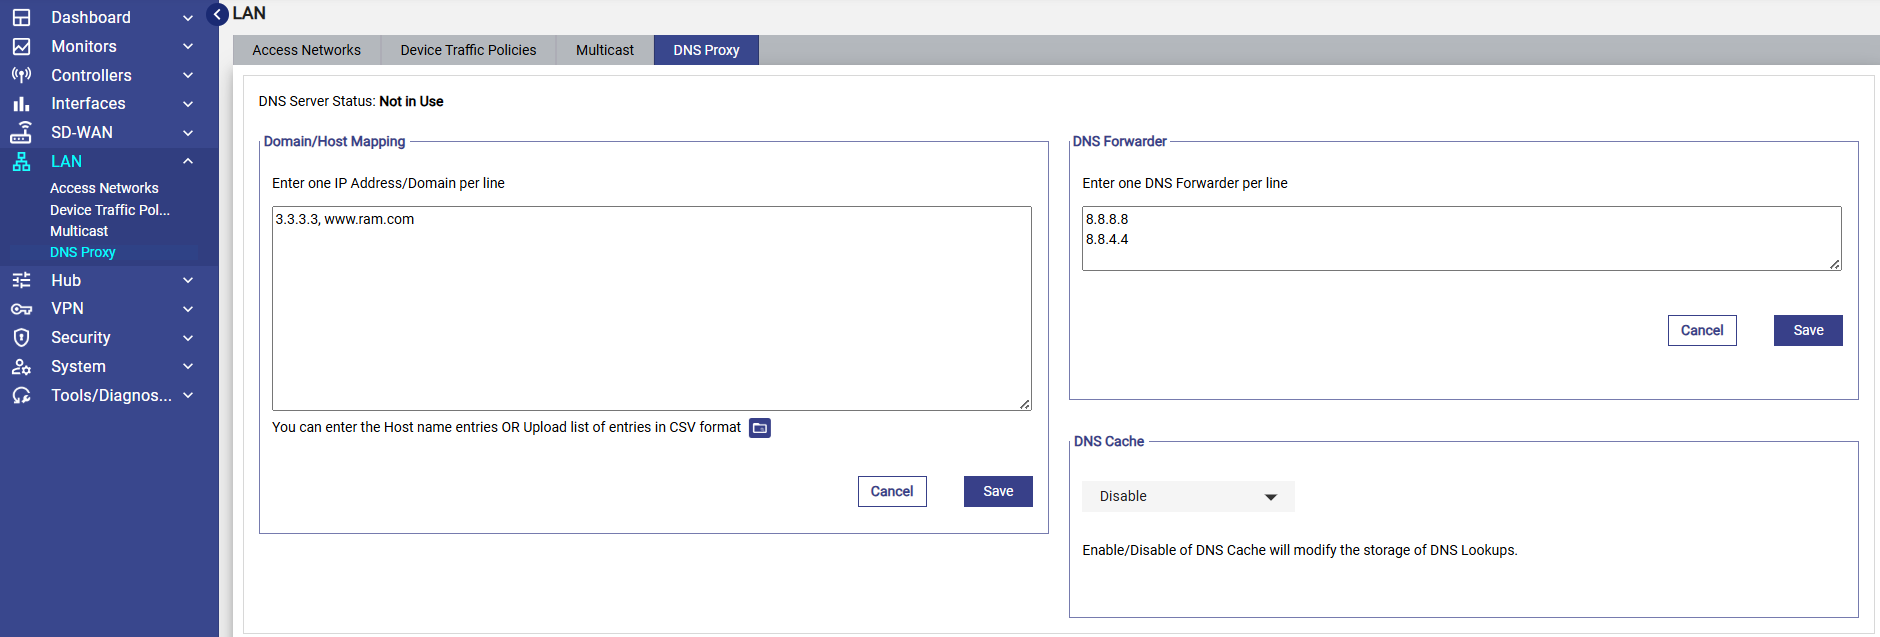
To configure the DNS proxy, perform the following steps. Steps
By default, the status Not In Use is displayed. |
|
|
To remove the DNS proxy, perform the following steps. Steps
Or,
The status Not in Use is displayed, see Figure Configure DNS Policy (Not in Use). |
|
|
IP Pools |
The default sequential range of the IP addresses becomes available. User can assign a new range of the sequential IP address. For this, click and delete the IP address range and then assign a new sequential range of the IP address. User can assign multiple sequential IP address range excluding the specific IP addresses of that range. This is an example. 192.168.10.2-192.168.10.100, 192.168.10.151-192.168.10.200, 192.168.10.220- 192.168.10.254 The following IP addresses will not be assigned to the device in the network.
DHCP will assign the IP address to a device on the specified network based on the IP address range. |
|
IP Reservations |
|
|
New IP Reservation |
To reserve an IP address for a device, perform the following steps. Steps
Configure the MAC Address, IP Address, Name, Traffic Policy, and Actions fields. |
|
MAC Address - Enter the MAC address of a device. |
|
|
IP Address - Enter IP address from the sequential IP address range specified in the IP Pools field. |
|
|
Name - Enter a name for the device. |
|
|
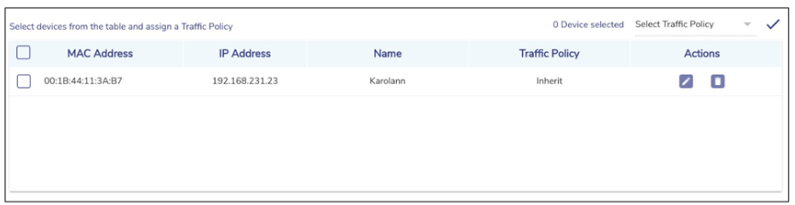
Traffic Policy - Click a traffic policy to be assigned to the device. Inherit indicates that the device will inherit the device policy of the network. |
|
|
Actions - To save the IP reservation configuration, click Green tick icon. or, To cancel the IP reservation configuration, click x. |
|
|
Bulk Upload |
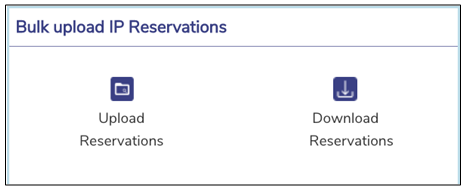
To upload details of the IP reservation, perform the following steps. Steps
|
|
|
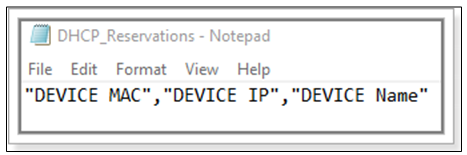
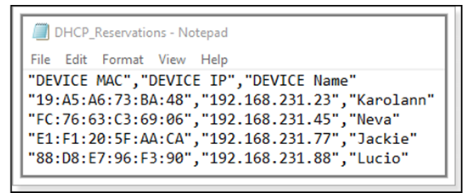
To download the bulk IP reservation template, click Download Reservations. The IP reservation template downloads in CSV format, see Figure IP Reservations Template in CSV Format. Fill in the required details in the file. For an example, see Figure Example of IP Reservations Template in CSV Format. The first row is referred to as the header row. Save the file.
|
|
|
User can modify the details of the IP reservation. To modify the details of the IP reservation, perform the following steps. Steps
Details of the IP reservation are modified. |
|
|
To delete the details of the IP reservation, perform the following steps. Steps
Assigning a traffic policy to multiple reserved devices To assign the same traffic policy to several devices in the IP Reservations table, perform the following steps.
|
Table Connected Network Information
Adding a Managed Routed Network
To add a Managed Routed Network, perform the following steps.
Steps
The pre-requisite to add a Managed Routed Network is to first create an Unmanaged
Connected Network.
-
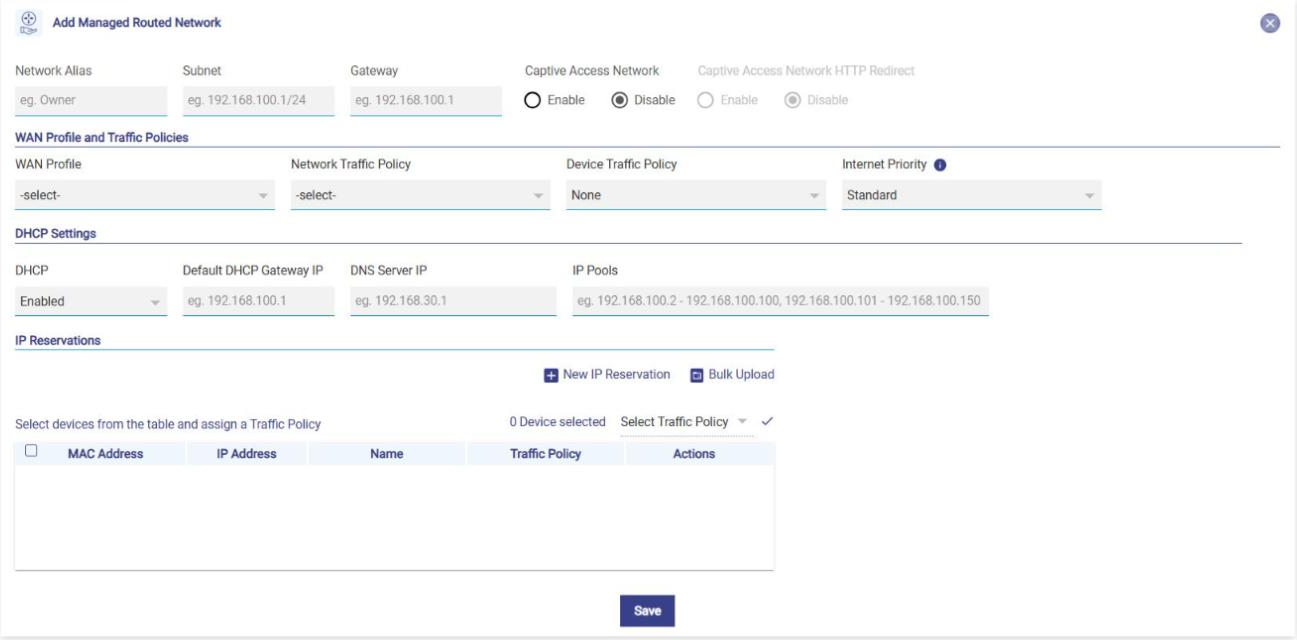
Click the Add Managed Routed Network button. The Add Managed Routed Network page appears, see figure below.
-
To enter data in the respective fields, see table below.
|
Fields |
Description |
|
Network Alias |
Enter a unique alias of the network. |
|
Subnet |
Enter the subnet based on the interface IP address and mask that was configured while configuring the connected network. |
|
Gateway |
Enter the IP address of the device managing the communication with the external network. User must assign the IP address based on the interface IP address that was configured while configuring the connected network. |
|
Captive Access Network |
Captive Portal allows for each crew member/client to have a provisioned account with an associated Service Plan. The Account’s “service plan” is customized to match corporate policy (Quota, Duration, Traffic Policy – e.g., 10GB/month with defined traffic policies). Click one of the following options. Disable (default). Captive functionality is disabled on the Access Network. Enable. To enable Captive functionality on the Access Network. |
|
Captive Access Network HTTP Redirect |
This option is available only when Captive Access Network is set to Enable; otherwise it is greyed out. When Captive Access Network is enabled, Captive Access Network HTTP Redirect is automatically set to Enable, see Figure Captive Access Network Configuration. Click one of the following options.
|
|
WAN Profile and Traffic Policies |
|
|
Same as corresponding fields in Table Connected Network Information. |
|
|
DHCP Settings |
|
|
Same as corresponding fields in Table Connected Network Information. |
|
|
IP Reservations |
|
|
For details of each section, see Table Connected Network Information. |
|
Table Managed Routed Network Information
-
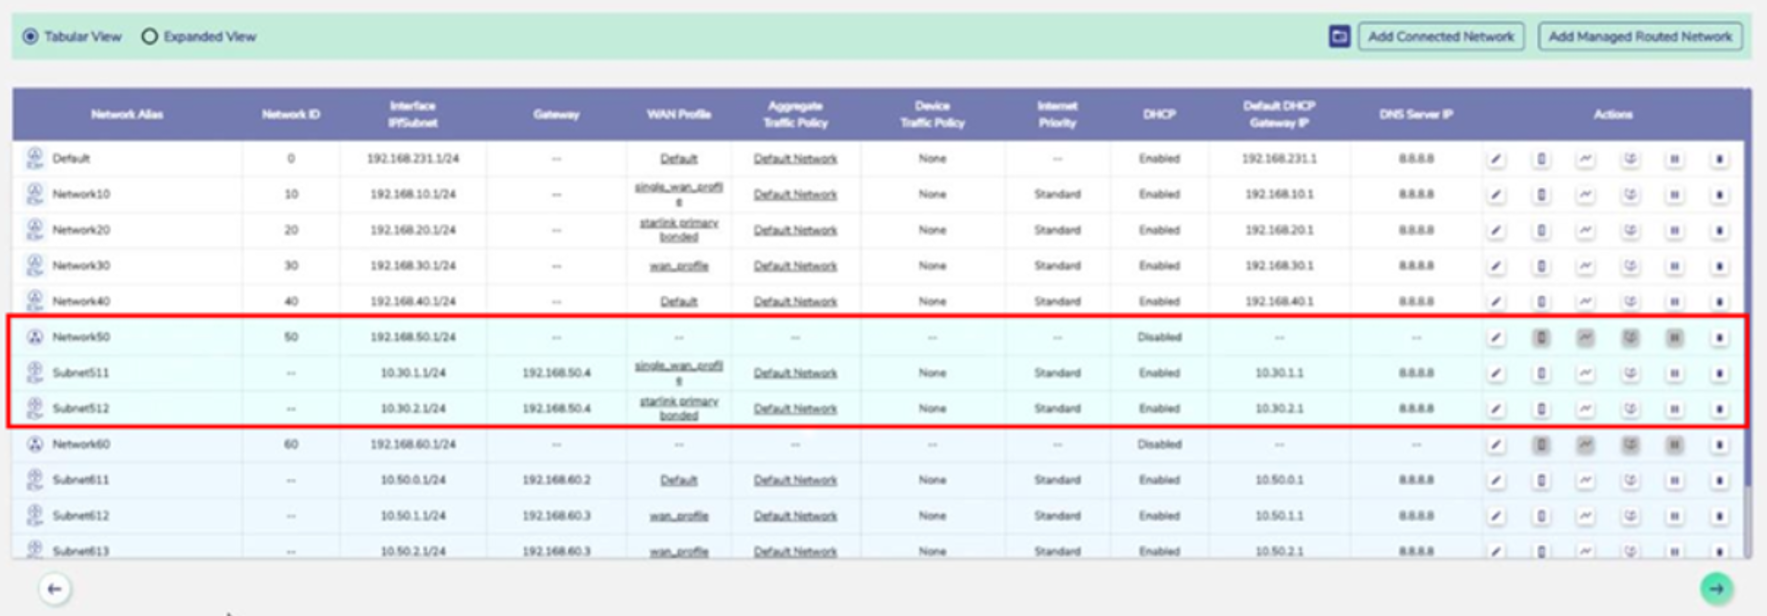
The Connected Network and associated Managed Routed Networks are grouped and appear in the same background color in the Access Networks table. See example table below.
Adding a Hub Managed Routed Network
A Hub Managed Routed Network is the Access Network of a remote Edge device that reaches this EpicOS System (acting as the Hub) through a tunnel. Adding it lets the user apply a WAN Profile, Network Traffic Policy, Device Traffic Policy and Internet Priority to the traffic of that remote network.
To add a Hub Managed Routed Network, perform the following steps.
Steps
-
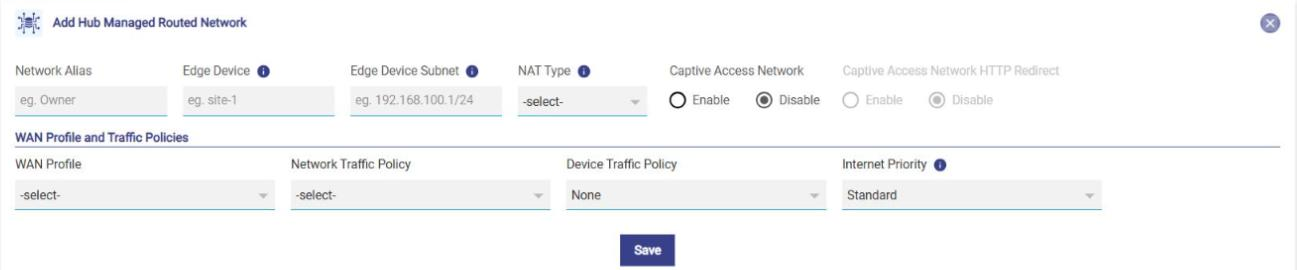
Click the Add Hub Managed Routed Network button at the top right of the Access Networks page. The Add Hub Managed Routed Network page appears, see figure below.
-
Enter data in the respective fields, see table below.
-
Click Save.
|
Fields |
Description |
|
Network Alias |
Enter a unique alias of the network. |
|
Edge Device |
Enter the name of the remote Edge device on site. It is used to identify the device hosting the tunnel. It can be set to a Device Name to cover all remote Edge devices. For details, click i next to the field. |
|
Edge Device Subnet |
Enter the subnet of the remote Edge Access Network that uses the tunnel, in CIDR format (for example, 192.168.100.1/24). |
|
NAT Type |
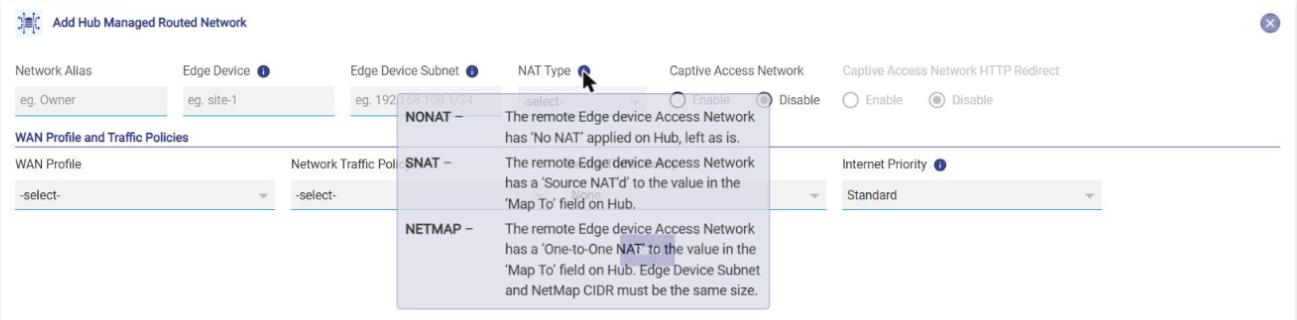
Select one of the following options. For details, click i next to the field, see Figure NAT Type Information.
|
|
Captive Access Network |
Same as the corresponding field in Table Connected Network Information. |
|
Captive Access Network HTTP Redirect |
Same as the corresponding field in Table Connected Network Information. |
|
WAN Profile and Traffic Policies |
WAN Profile, Network Traffic Policy, Device Traffic Policy and Internet Priority (default Standard). Same as the corresponding fields in Table Connected Network Information. |
Table Hub Managed Routed Network Information
Note: The Add Hub Managed Routed Network page does not have the DHCP Settings and IP Reservations sections.
Modifying Network
To modify a network, perform the following steps.
Steps
-
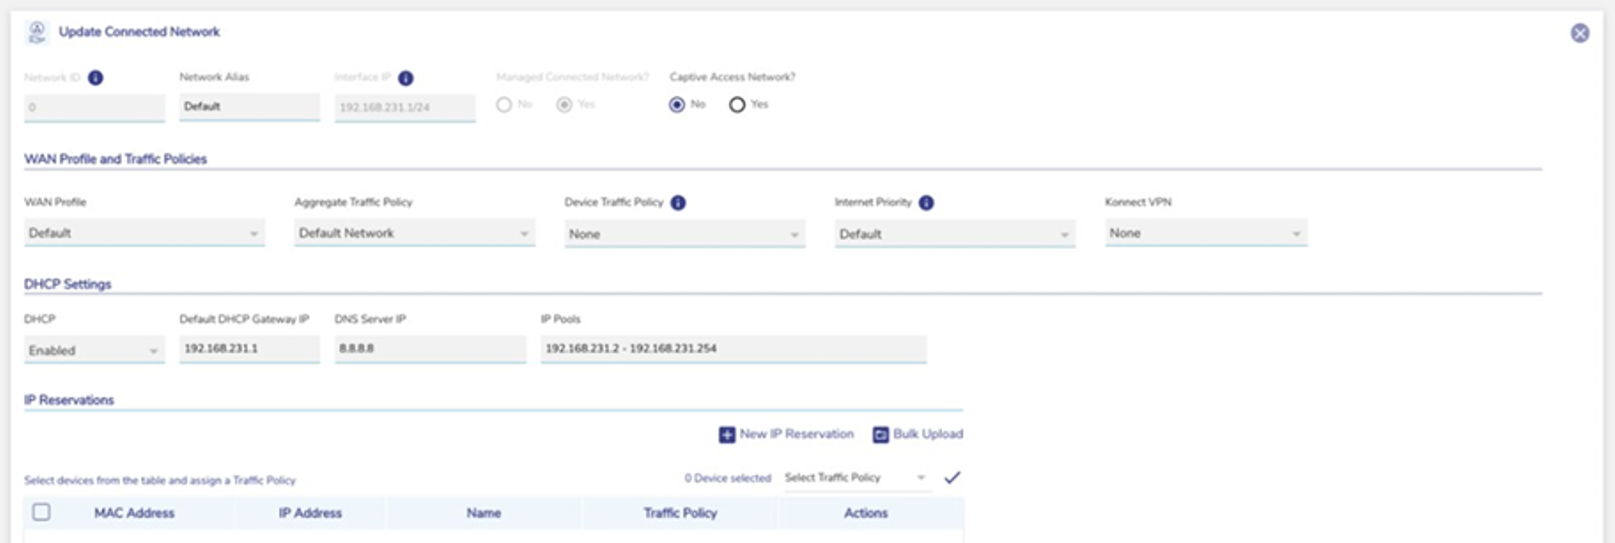
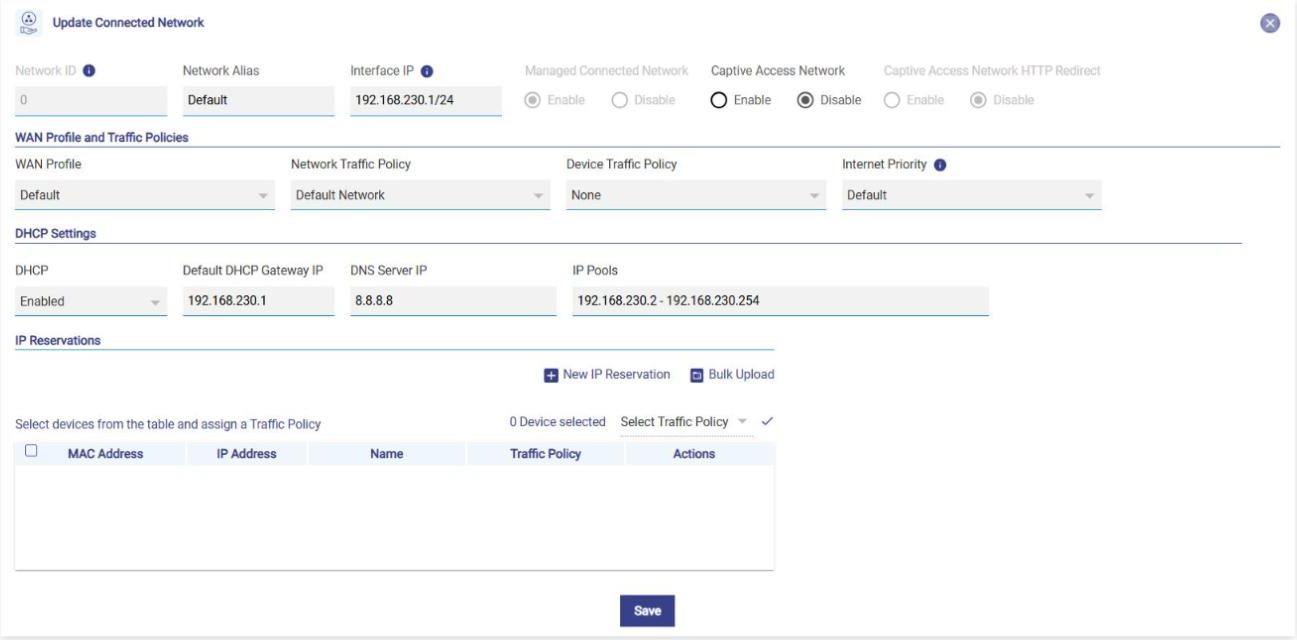
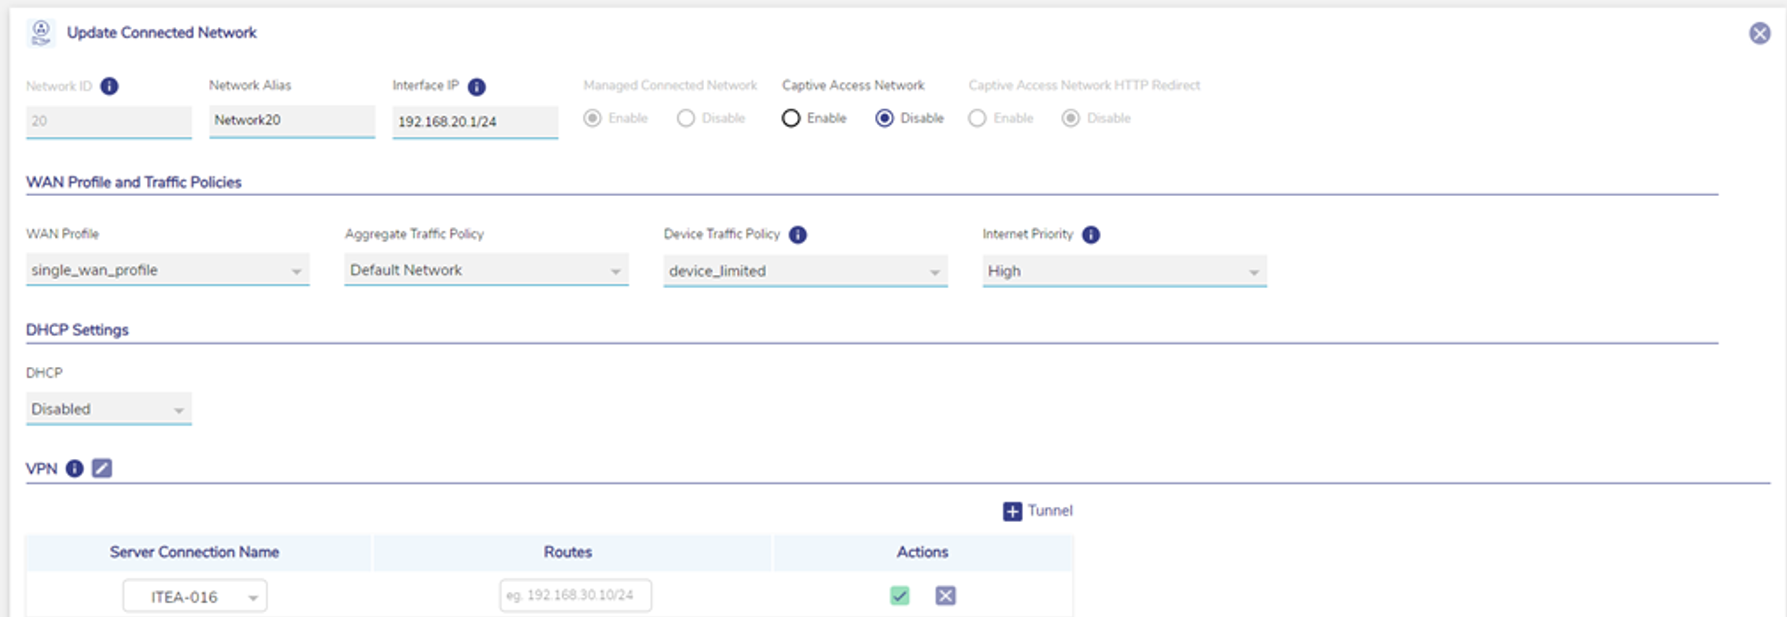
Click pencil icon next to the network under the Action section on the Access Networks page. The Update Connected Network page appears, see Figure Update Connected Network. To enter data in the respective fields, see Table Connected Network Information.
Note: All fields except Network ID and Managed Connected Network are editable. Captive Access Network HTTP Redirect can be changed only when Captive Access Network is set to Enable.
-
Click Save.
Managing Device Profiles
A device profile assigns a fixed IP address, a name and a traffic policy to a device (MAC address) on the network.
To add a device profile, perform the following steps.
Steps
-
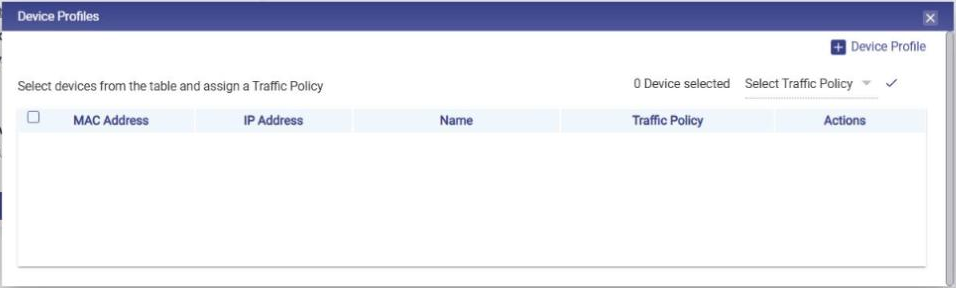
Click the Device Profiles icon corresponding to the network under the Actions column on the Access Networks page. The Device Profiles pop-up window appears, see figure below.
-
Click + Device Profile at the top right. A new row is added to the table.
-
Enter the MAC Address, IP Address and Name of the device.
-
In the Traffic Policy list, select a traffic policy. Inherit (default) indicates that the device inherits the Device Traffic Policy of the network.
-
Click the green tick icon under Actions to save the row, or click X to cancel.
To assign the same traffic policy to several devices, select their check boxes (the count is displayed in the Device selected field), select the policy in the Select Traffic Policy list and click the tick icon.
To close the pop-up window, click X at the top right.
Viewing Network Usage Data
To view the usage data of a network, click the Network Usage Data icon corresponding to the network under the Actions column on the Access Networks page (Tabular View). The Monitors > Usage Status page opens, which displays the Top Networks and Top Devices usage per WAN link. For details about the fields, see section Usage Status.
Configuring Captive Access Network
Captive Portal allows for each crew member/client to have a provisioned account with an associated Service Plan. The Account’s “service plan” is customized to match corporate policy (Quota, Duration, Traffic Policy – e.g., 10GB/month with defined traffic policies).
To configure an Access Network as Captive, perform the following steps.
Steps
-
Click the Edit Network (pencil) icon of the Access Network that the user wants to make Captive.
-
Set the Captive Access Network field to Enable. The Captive Access Network HTTP Redirect field becomes available and is set to Enable by default, so that devices that have not logged in are redirected to the Captive Portal login page. See Figure Captive Access Network Configuration.
-
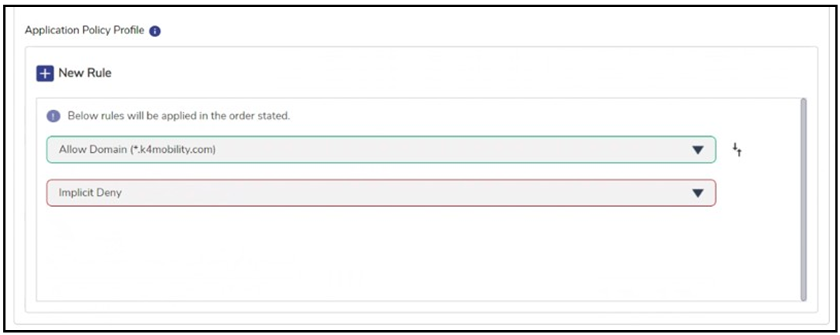
Set the Network Traffic Policy such that all applications but *.k4mobility.com is denied, see Figure Network Traffic Policy.
-
Optionally, select a Device Traffic Policy. On a Captive Access Network, this policy applies to devices that are connected to the network but have not yet logged in through the Captive Portal, for example to set a usage quota or speed limit before login. Leave it as None if no pre-login policy is needed.
-
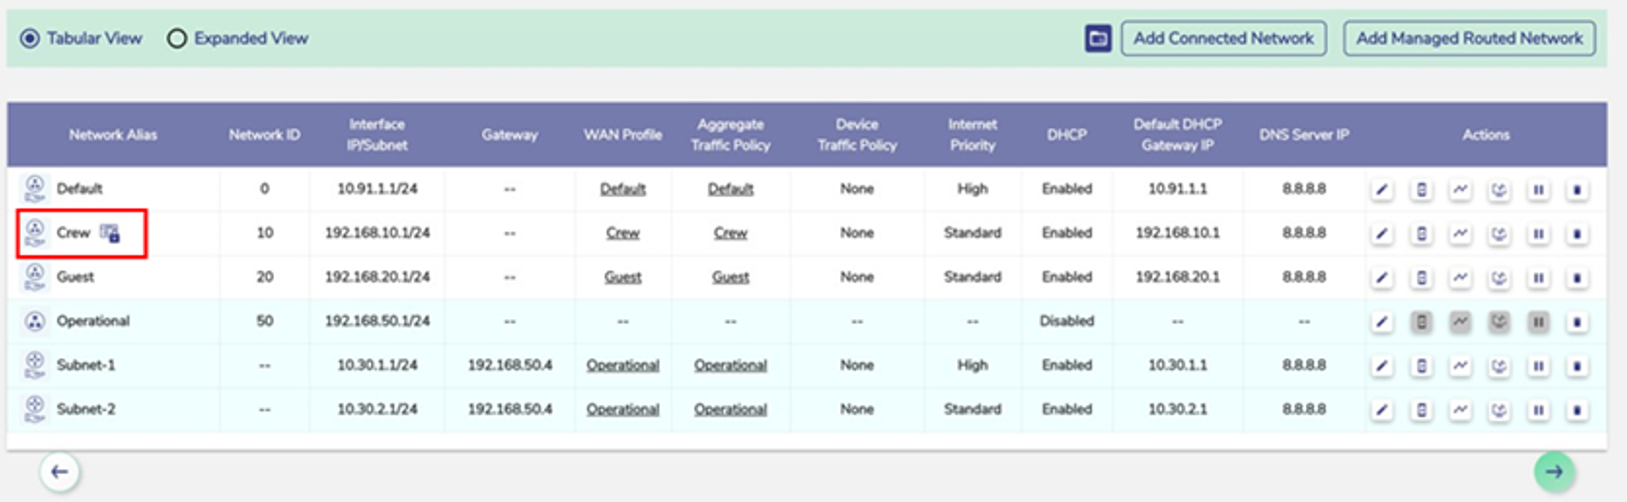
Click Save. The Captive Access Network will be created. This will show up with Captive Access Network icon next to it, see Figure Captive Access Network.
-
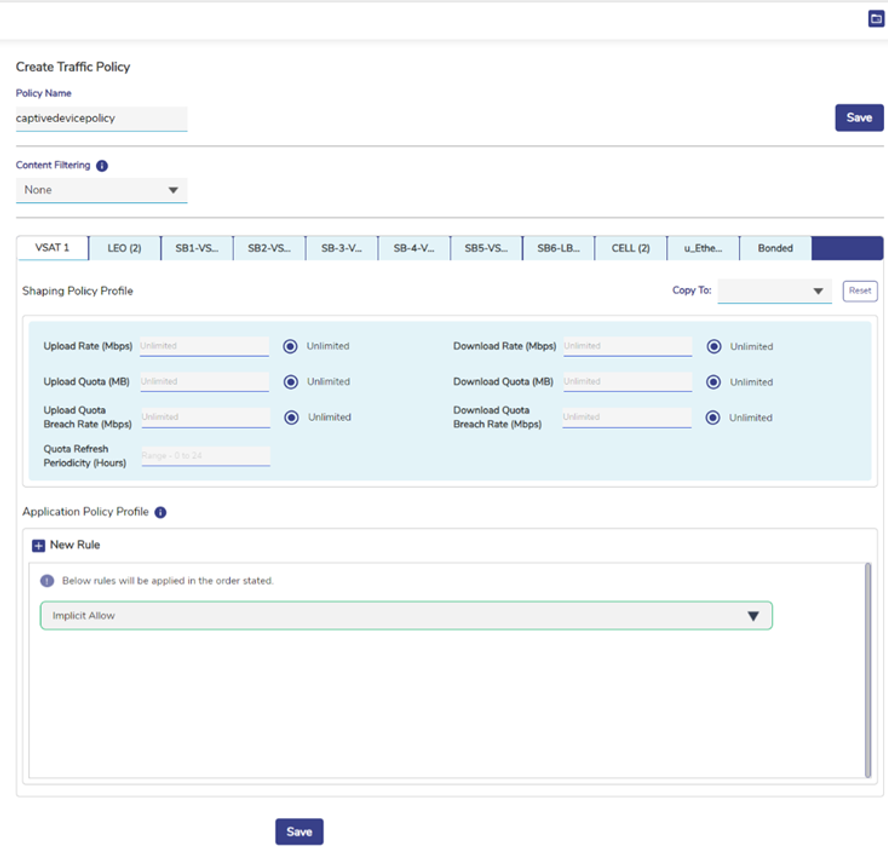
Create one or more Device Traffic Policies in the Traffic Policy Section which will apply to devices connecting via Captive Access Network, see Figure Device Traffic Policy. These policies will be associated with the plans assigned to users of these devices.
Note: The Device Traffic Policy selected on the Access Network applies to devices before they log in. The Device Traffic Policies linked to user plans apply after the user logs in.

Configuring VPN
To route the Access Network traffic through the VPN, edit the Access Network configuration to pick the configured VPN end point to route. This allows the EpicOS System to VPN access networks to a Konnect VPN Server; this is most utilized between EpicOS Systems. For details of VPN Configuration, see section VPN.
To configure VPN, perform the following steps:
Steps
-
Click Pencil icon of the Access Network that the user wants to configure VPN for.
-
In the ‘Access Networks’ configuration for any Connected Network, the server connection to associate with can be selected from the VPN Section. The selection can be done at the time of creating an Access Network or by editing it as shown below.
-
Scroll down to the VPN section. See Figure VPN Configuration.
-
Click + Tunnel button to associate any route with any configured VPN connection – route ‘0.0.0.0/0’ is the ‘default’ route. Multiple such routes may be defined – making ‘split tunnel’ configuration possible. Any route not caught by this table will be routed over the default routing of the EdgeServer using the WAN Profile configured.
-
Choose the VPN Connection from the Server Connection Name dropdown.
-
Enter the Routes in the CIDR format.
-
Click the Green tick icon to confirm.
-
Click X to cancel the operation.
LAN Monitoring
To monitor a device connected to the network, perform the following steps.
Steps
-
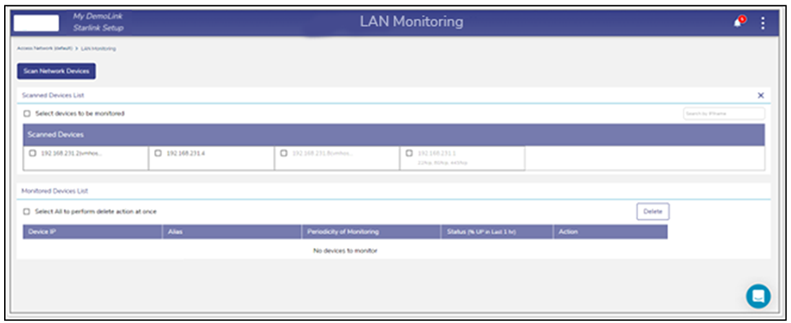
Click the LAN Monitoring icon corresponding to the network under the Actions column on the Access Networks page. The LAN Monitoring page appears with the breadcrumb Access Network (<network alias>) > LAN Monitoring, see figure below. The page displays the Scan Network Devices button and the Monitored Devices List with the columns Device IP, Alias, Periodicity of Monitoring, Status (% UP in Last 1 hr) and Actions. To return to the Access Networks page, click Access Network (<network alias>) in the breadcrumb.

-
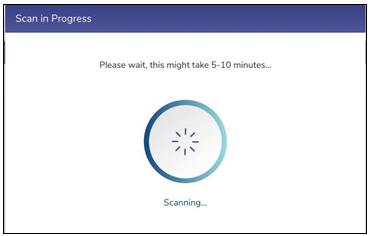
Click Scan Network Devices. The scan is in progress, see figure below.
The scanned network devices list is displayed, see figure below.
-
Select the IP address check box of the devices under the Scanned Devices List section. Or,
-
To select all devices, select the Select devices to be monitored check box under the Scanned Devices List section.
-
The IP address of the device becomes available under the Monitored Devices List, see figure below.
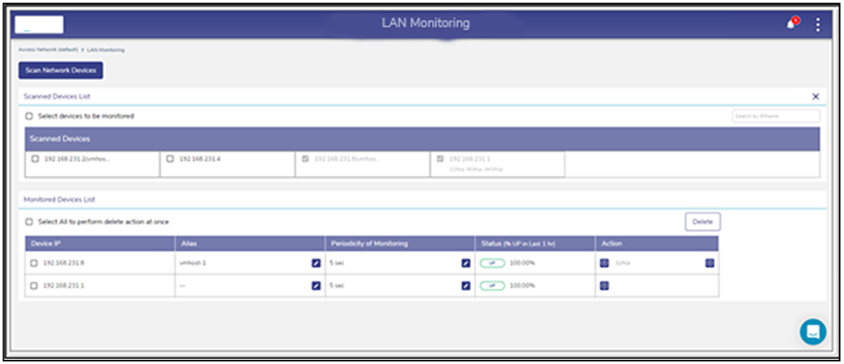
If the device is up, then the status Up is displayed under the Status (% UP in Last 1 hr.) section.
If the device is down, then the status Down is displayed under the Status (% UP in Last 1 hr.) section.
Additionally, the duration of the device being up in the last 1 hour is displayed next to the status under the Status (% UP in Last 1 hr.) section.
Configuring Periodicity of Monitoring
To configure the periodicity of monitoring, perform the following steps.
Steps
-
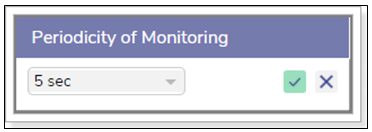
Click Pencil icon under the Periodicity of Monitoring section on the LAN Monitoring page. The periodicity list becomes available, see figure below.
-
In the periodicity list, click the periodicity.
-
Click Green tick.
The device is monitored based on the configured periodicity. Or,
To exit without configuring the periodicity of monitoring, click X.
Adding to Konnect
To add to the Konnect, perform the following steps.
Steps
-
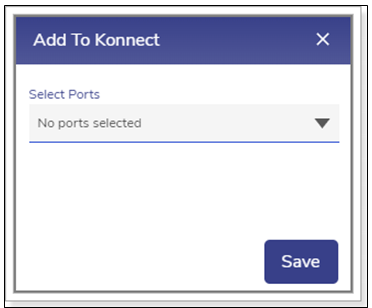
Click Add to Konnect under the Action section on the LAN Monitoring page. The Add to Konnect pop-up window appears, see figure below.
-
Click the port list and then select the port number check box. User can select multiple port numbers.
-
Click Save. The port numbers are displayed under the Action section, see figure below.
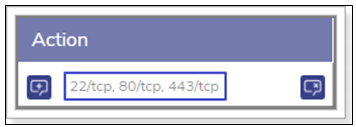
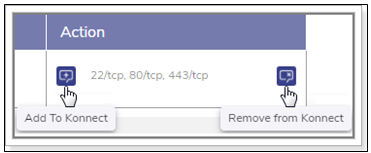
In addition to this, the Remove from Konnect icon becomes available under the Action section, see figure below.
Removing from Konnect
To remove from Konnect, perform the following steps.
Steps
-
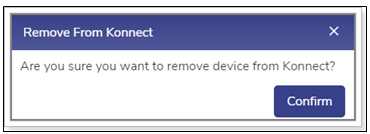
Click the Remove from Konnect icon, see Figure Add/Remove from Konnect. The Remove From Konnect pop-up window appears, see Figure Remove from Konnect Pop-up.
-
Click Confirm.
The device is removed from the Konnect.
Deleting the Monitored Devices
To delete the monitored devices, perform the following steps.
Steps
-
Select the IP address check box.
User can select multiple devices. Or,
-
To select all devices, select the Select All to perform delete action at once check box under the Monitored Devices List section.
-
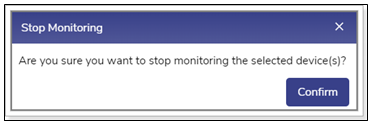
Click Delete. The Stop Monitoring pop-up window appears, see Figure Stop Monitoring.
-
Click Confirm.
The device is deleted. Therefore, it is not monitored.
Pausing or Resuming Network Traffic
To pause the network traffic, perform the following steps.
Steps
-
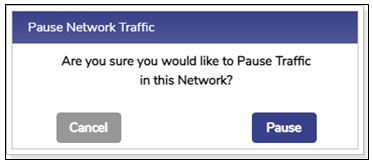
Click Pause icon corresponding to the network under the Action section on the Access Networks page. The Pause Network Traffic confirmation message pop-up window appears, see figure below.
-
Click Pause. The Resume Network Traffic Play button becomes available, and the row of the network is highlighted by color. In addition to this, Pause icon becomes available corresponding to the network under the Network Alias field.
User cannot pause the network traffic of an unmanaged connected network.
To resume the network traffic, perform the following steps.
Steps
-
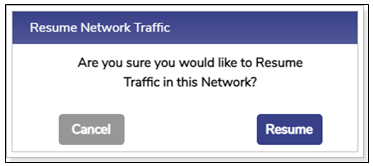
Click Play corresponding to the network under the Action section on the Access Networks page. The Resume Network Traffic confirmation message pop-up window appears, see figure below.
-
Click Resume. The network traffic on the network resumes.
Deleting Network
To delete the network, perform the following steps.
Steps
-
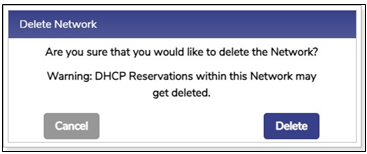
Click Delete icon corresponding to the network under the Action section on the Access Networks page. The Delete Network confirmation message pop- up window appears, see figure below.
-
Click Delete.
-
The network is successfully deleted. This will impact the DHCP reservations. Therefore, it is highly recommended to verify the network details before deleting the network.