
Overview
The User Portal enables users to manage their internet access and account information through a self-service interface. Depending on how the portal is configured by the administrator, users can view their active internet plan, monitor session activity, purchase or activate available plans, update account information, and perform other account-related tasks.
For deployments with Multi-Plan support enabled, users can also view all plans assigned to their account, activate the plan that best suits their current needs, and review session history across their assigned plans. At any given time, only one plan is active and used for network access, while the remaining assigned plans remain in the Idle state available for activation.
Active Plan
-
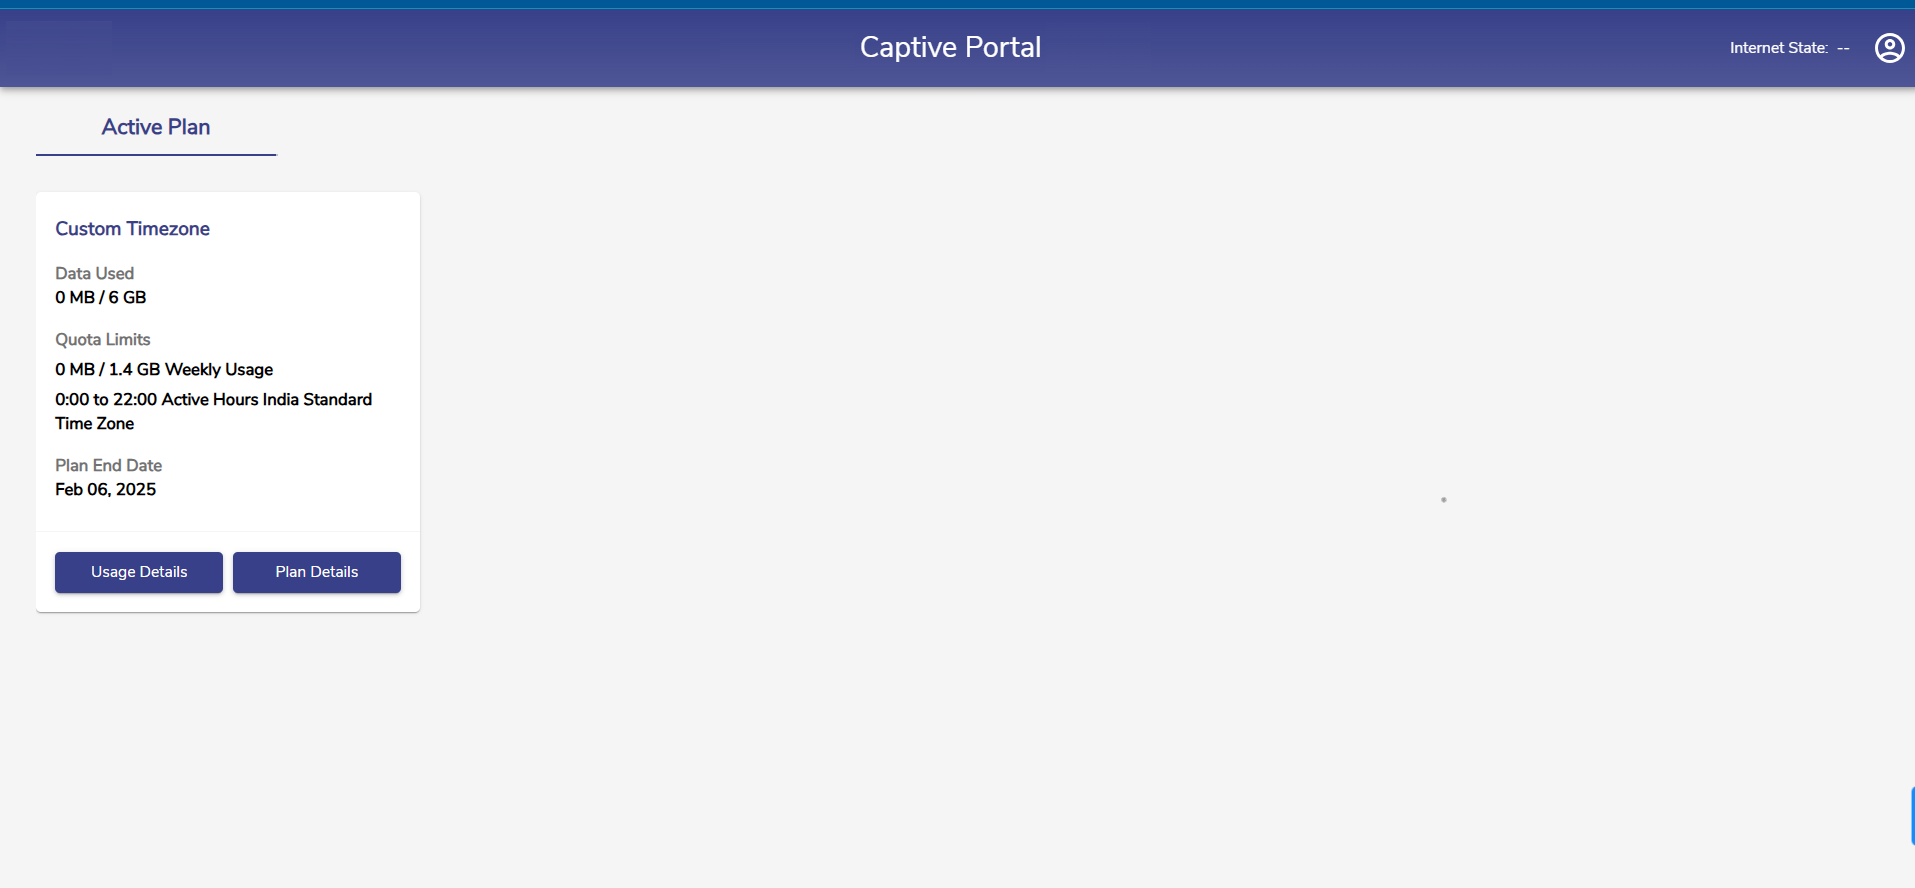
Once the user credentials are verified, the user is redirected to the User Portal Homepage.
-
The Active Plan tab is selected by default.
-
The Homepage shows the name of the Active Plan of the user, Data Used and Remaining quota, Quota Limits, Time Allowance set for the plan, Time Zone, and the Plan End Date. The above screenshot shows the Quota Limits set for Weekly Usage.
-
Click Usage Details button to view the usage details.

-
The Usage Details table shows the following information:
-
Host Name
-
Device Type
-
Start Time
-
End Time
-
Currently Logged In
-
Quota Used
-
Logout Cause
-
IP Address
-
MAC Address
-
-20250109-152055.png?cb=cbb8e5160eeb49aed4928f22c341e1b6)
-
The above screenshot shows the Quota Limits set for Weekly Usage and Time Limits. The admin can also set daily usage limits.
Multi Plan Support
By default, the User Portal follows a single-plan model, where users can possess only one ongoing plan at a time. Users can purchase or activate another plan only after their current plan has expired, and the active plan is automatically used for all network sessions.
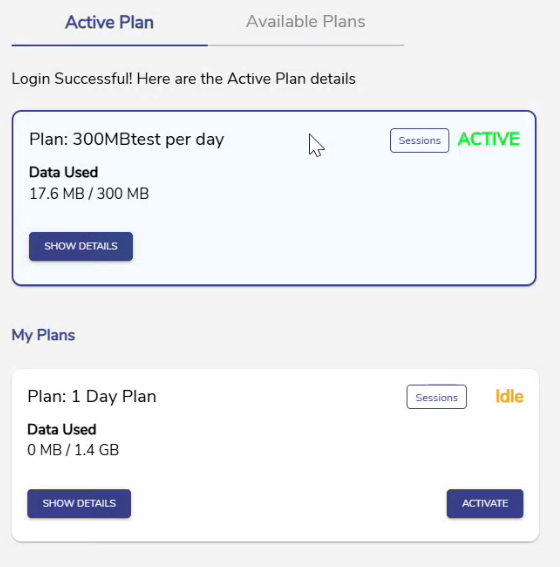
When Multi-Plan support is enabled, users can possess multiple ongoing plans simultaneously. These plans are displayed under the My Plans section of the User Portal. Although multiple plans can coexist on a user's account, only one plan can be Active at any given time.
The currently active plan is labelled ACTIVE and is used to establish all network sessions. The remaining assigned plans are labelled Idle and remain available for activation but are not used for network access.
Users can activate any Idle plan at any time based on their current connectivity requirements. Activating an Idle plan automatically moves the previously Active plan to the Idle state and establishes a new network session using the newly activated plan.
Note:
-
Only one plan can be Active at any given time.
-
Network sessions are established using the currently Active plan.
-
Users can switch between their assigned plans whenever required, provided Multi-Plan support is enabled for the deployment.
Available Plans
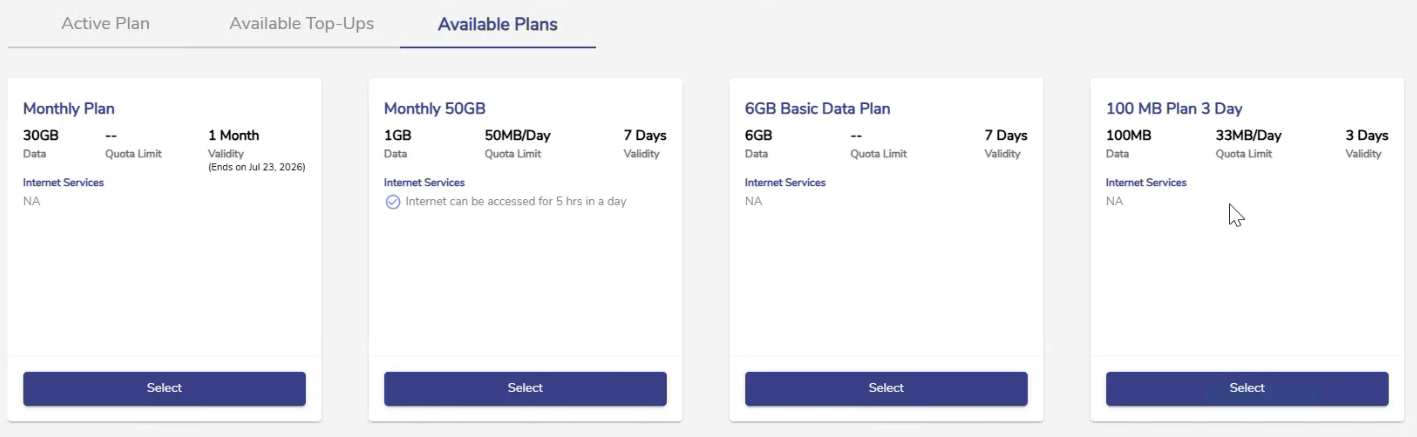
The Available Plans tab displays plans assigned to the user and is available for activation.
Users can:
-
View every assigned plan.
-
Review plan details.
-
Activate a different plan.
-
Switch between assigned plans whenever required.
-
Paywall enabled users can purchase multiple plans at the same time.
Only plans assigned by the administrator are displayed.
When a new plan is selected:
-
The selected plan becomes the Active plan.
-
The previously Active plan moves to the Idle state.
-
A new network session is created using the newly activated plan's policy.
Important Notes:
-
Multi-Plan functionality is available only for organizations where it has been enabled by the administrator.
-
Users can have multiple assigned plans.
-
-
Only one plan can be Active at any given time.
-
Switching plans starts a new session using the newly selected plan.
-
The previously Active plan becomes Idle and remains available for future use.
Overage Plan
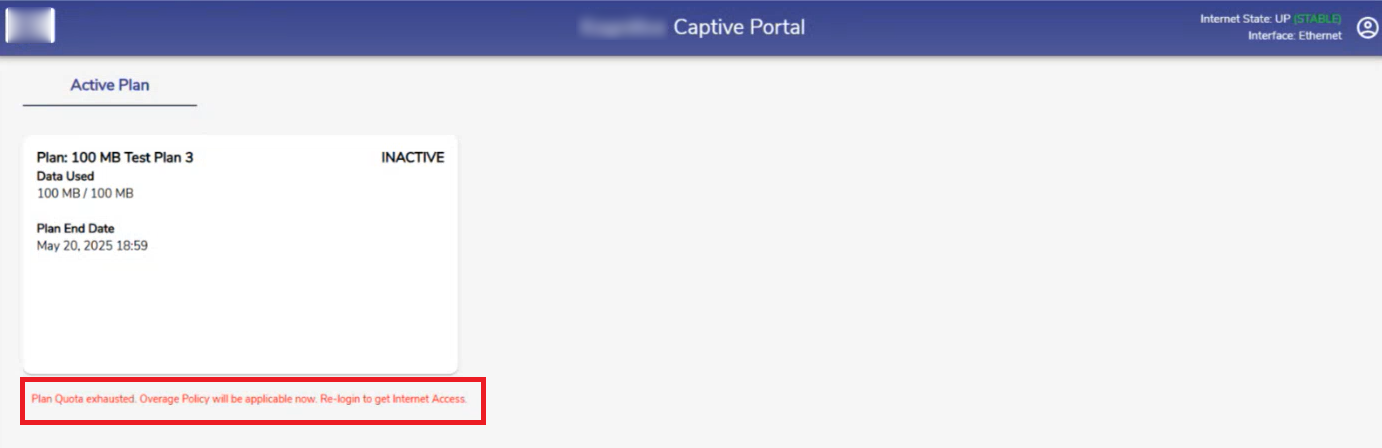
By default, when a plan's quota is fully exhausted, internet access is terminated regardless of the WAN types selected in the WAN Type field. However, if an Overage Traffic Policy and corresponding Overage WAN Profile are configured in the plan, connectivity can continue through the specified overage settings.
The Overage Traffic Policy and Overage WAN Profile fields in the Add New Plan configuration within the Admin Portal enable continued internet access after the plan quota is exhausted.
-
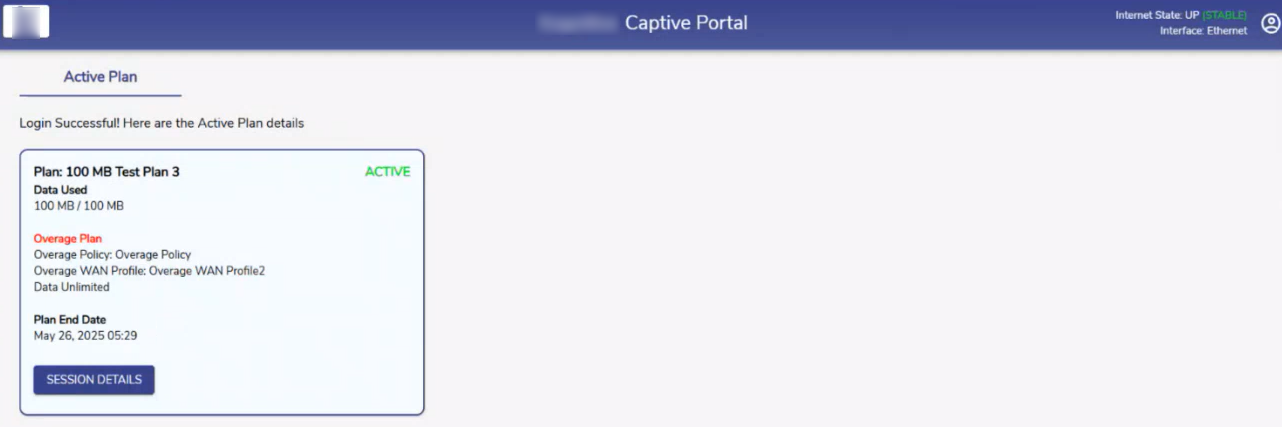
When a plan's quota is fully exhausted, and the Overage Traffic Policy and Overage WAN Profile fields were configured during plan creation, the following message is displayed in the User Portal.
-
After logging out and logging back in, the following screen is displayed.
-
The Overage Traffic Policy and Overage WAN Profile will be applied to the user’s account. Their details will also be shown.
Menu
-
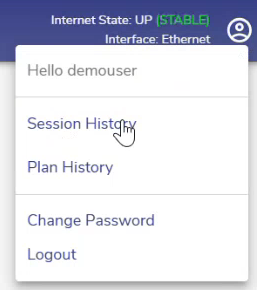
Clicking the

-
Select Log Out to stop accessing the internet and logout from the Portal.
-
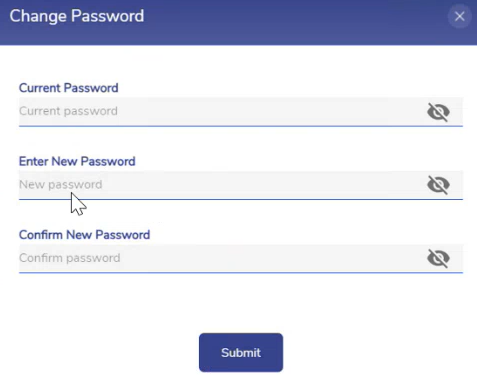
Click Change Password to change the Password anytime. The Change Password dialog box opens.
-
Enter the Current Password.
-
Enter the New Password.
-
Re-enter the New Password to confirm it.
-
Click Submit button to save the changes.
Session History
-
Click the Session History option to view the session activity for all plans assigned to the user.
-
Unlike the Sessions page, which shows activity for the currently Active plan, Session History provides a consolidated view of sessions created using both Active and previously Active (Idle) plans.
