Keywords: EpicOS, Product Registration, EpicLink, New device registration
The registration process associates the EpicOS System with the user’s account and installation location, facilitating management in:
EpicLink: Cloud-Based Service Portal
Edge: Mobile App
Konnect: VPN service
Pre-requisites for Registration
Group Account: Account setup is performed by Sales Team as of the onboarding process
User Account / Mobile App: User has an active user account with the Mobile App installed on a mobile device -OR- login access to EpicLink
EpicOS System is Online: The device being registered is powered on with an active internet connection
Registration through EpicLink
All newly procured devices should be listed in the Inventory > Warehouse tab of the EpicLink Portal.
-
Login to EpicLink using a web browser at https://epiclink.sat-elite.io
-
Select Inventory from the left menu bar.
-
Select the Warehouse tab to see the list of devices available for registration.
-
Select the appropriate Organization and find the device to be registered by matching the Device ID (DID) printed on the device with the row in the table.
-20250904-134037.png?cb=238156667f24a93f9bf52a3bc9676bf6)
-
Select the
-20250904-134249.png?cb=3652d71281effb4cd3d3e0a29dccd725)
-
In the Select Organization field, select the required organization from the dropdown menu.
-
Next the user has to select the site. A Site is a Vessel, Store, Car, Truck, etc. where the Edge System will remain present and can reliably be identified by the management. Multiple Edge nodes can be in a single Site. The options here are to use an existing Site or add a new Site.
-
In the Create/Search Site field, type the name of the required site.
-
Select the site from the list of existing sites in the system.
-
To add a new Site, enter the name of the site and click Add.
-
This will create a new site and assign the device to that site.
-
Enter a Device Name.
-
In the Select License field, select a License type from the dropdown menu .
-
Select the Term from the dropdown menu.
-
In the Upgrade EOS field, select the Yes radio button to update the EOS Version of the device. Click No to continue with the existing EOS Version.
-
In the Apply Default Config field, select the Yes radio button to apply the default configuration for that site.
-
Select the No radio button to let the device continue in its current configuration.
-
Select the Other radio button to select any configuration from the list of available Backup Configurations taken and stored by the user.
-
In the Select Configuration field, select the required configuration from the dropdown menu.
-
Click Register button to assign the device to the selected site and complete the registration process.
-
Once assigned, the device gets moved from the Warehouse tab and is displayed under the Inventory > Deployed tab.
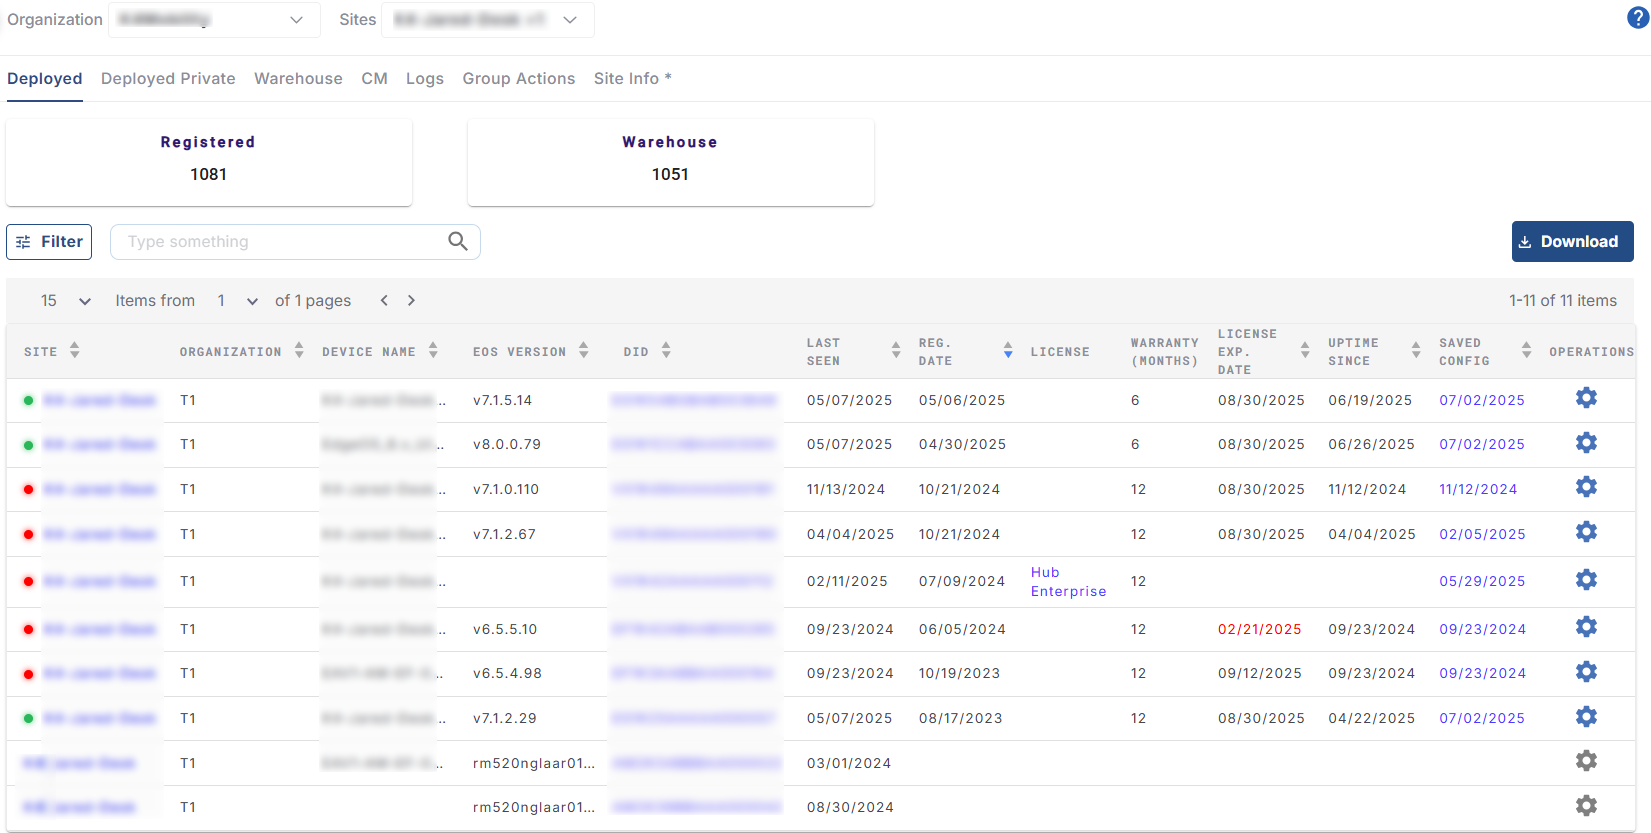
-
The newly registered device will also appear in the Sites > Topology screen.
-20250904-134444.png?cb=cbc6c0b2a42048ab4285d7decd1d3046)
-
After successful registration, the device can be powered on and connected to the internet.
-
After the registration is complete, the table in the Deployed Tab displays the Site Name, Device Type, Serial Number, Registration Date, Organization, etc.
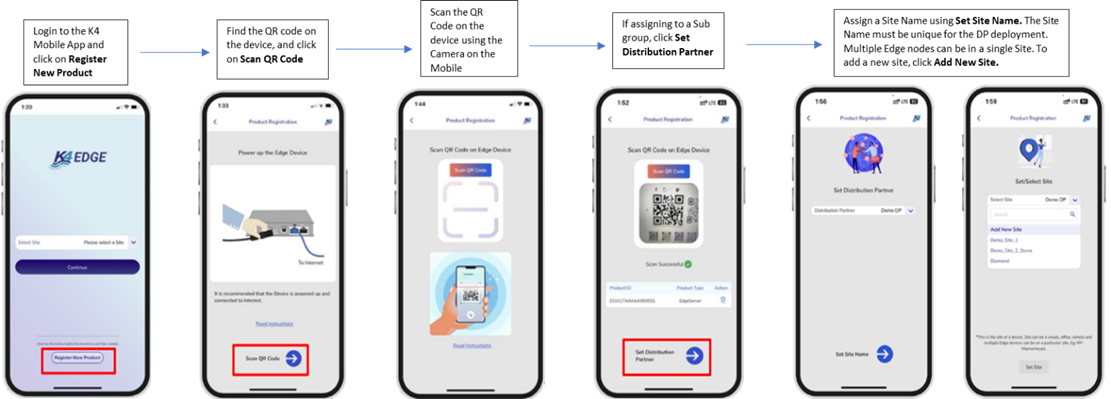
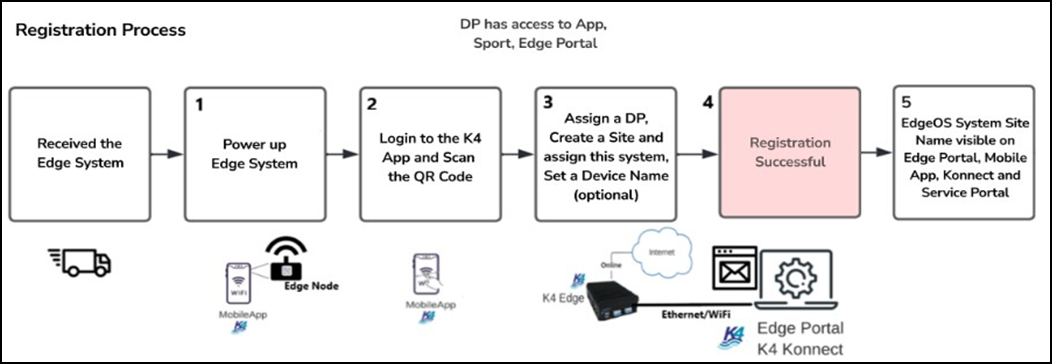
Registration through the Mobile App
-
Power up and connect EpicOS system to the internet, e.g., plug WAN 1 into an ethernet internet source.
Steps for Registration
-
Power up and connect the EpicOS System to the internet, e.g., plug WAN 1 into an ethernet internet source.
-
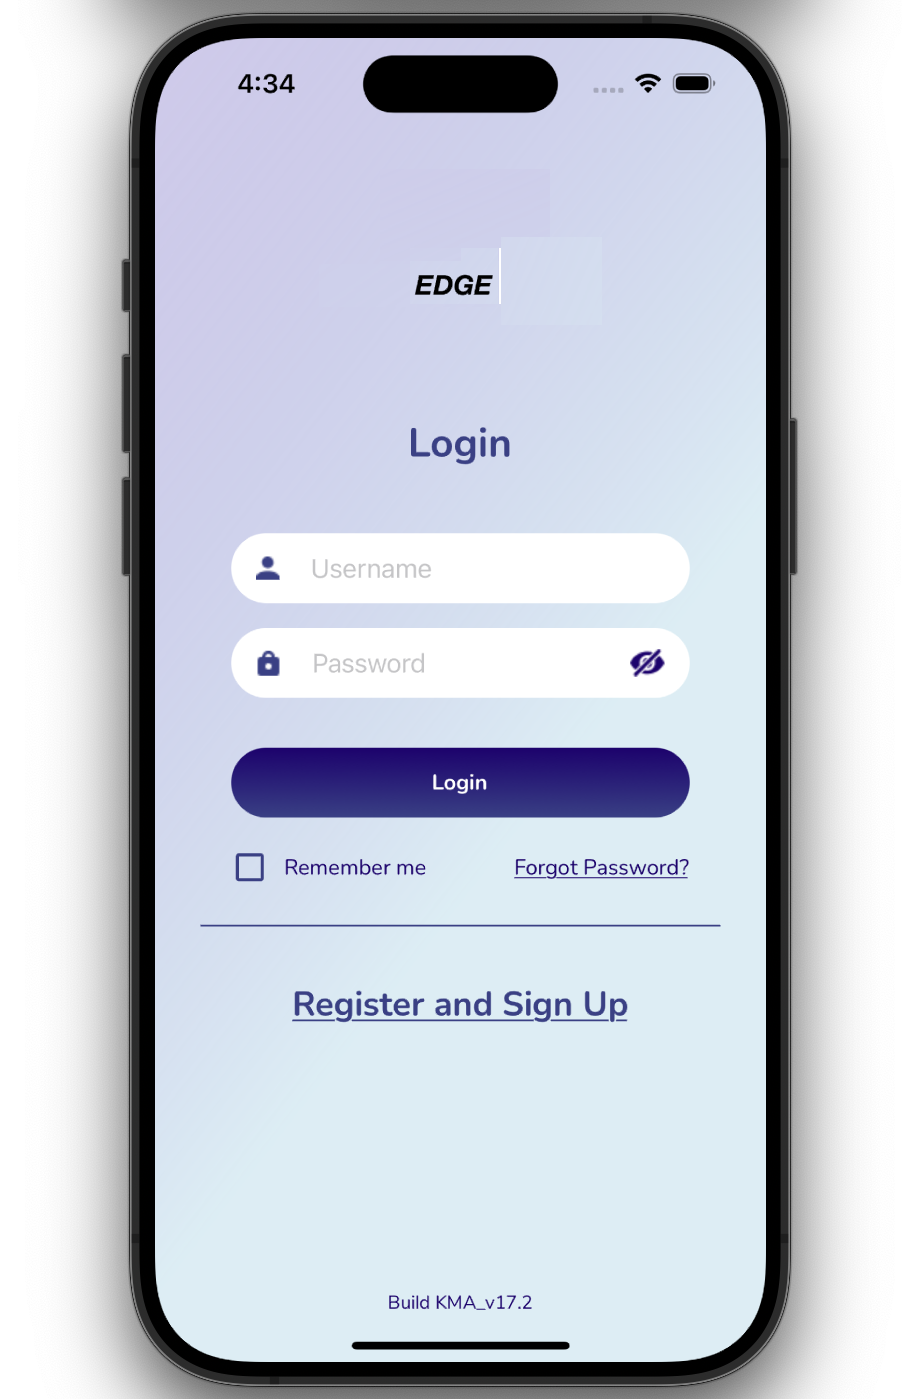
Click the Register and Signup button.
-
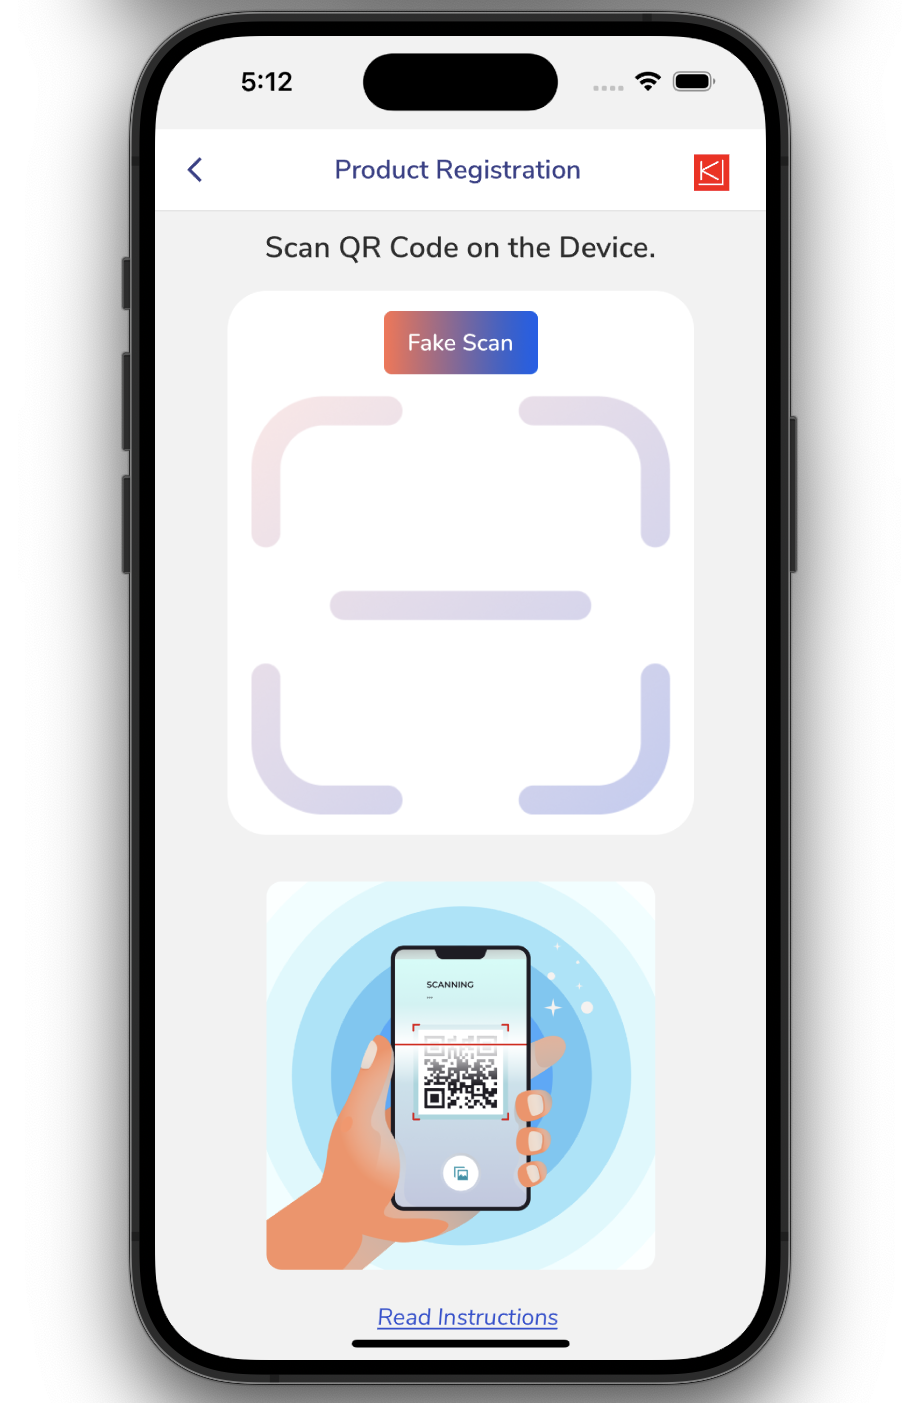
Scan the QR code provided on the device. Click the Read Instructions button to view the required steps.
-
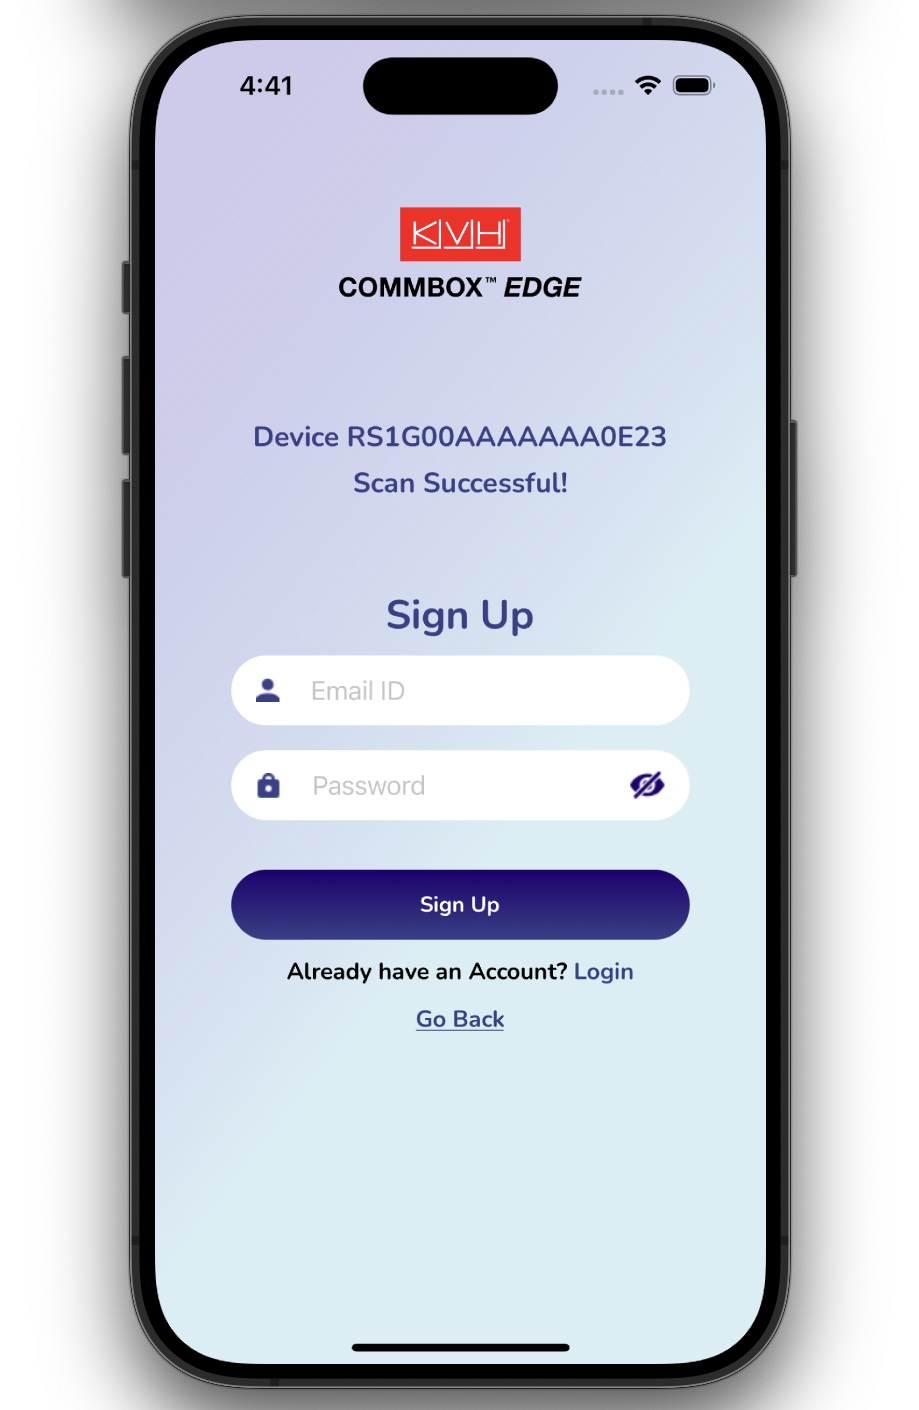
After a successful scan, the device details are displayed. Enter your email ID and set your password to sign up.
-
Existing users can select the Login button and sign in to their account.
-
-
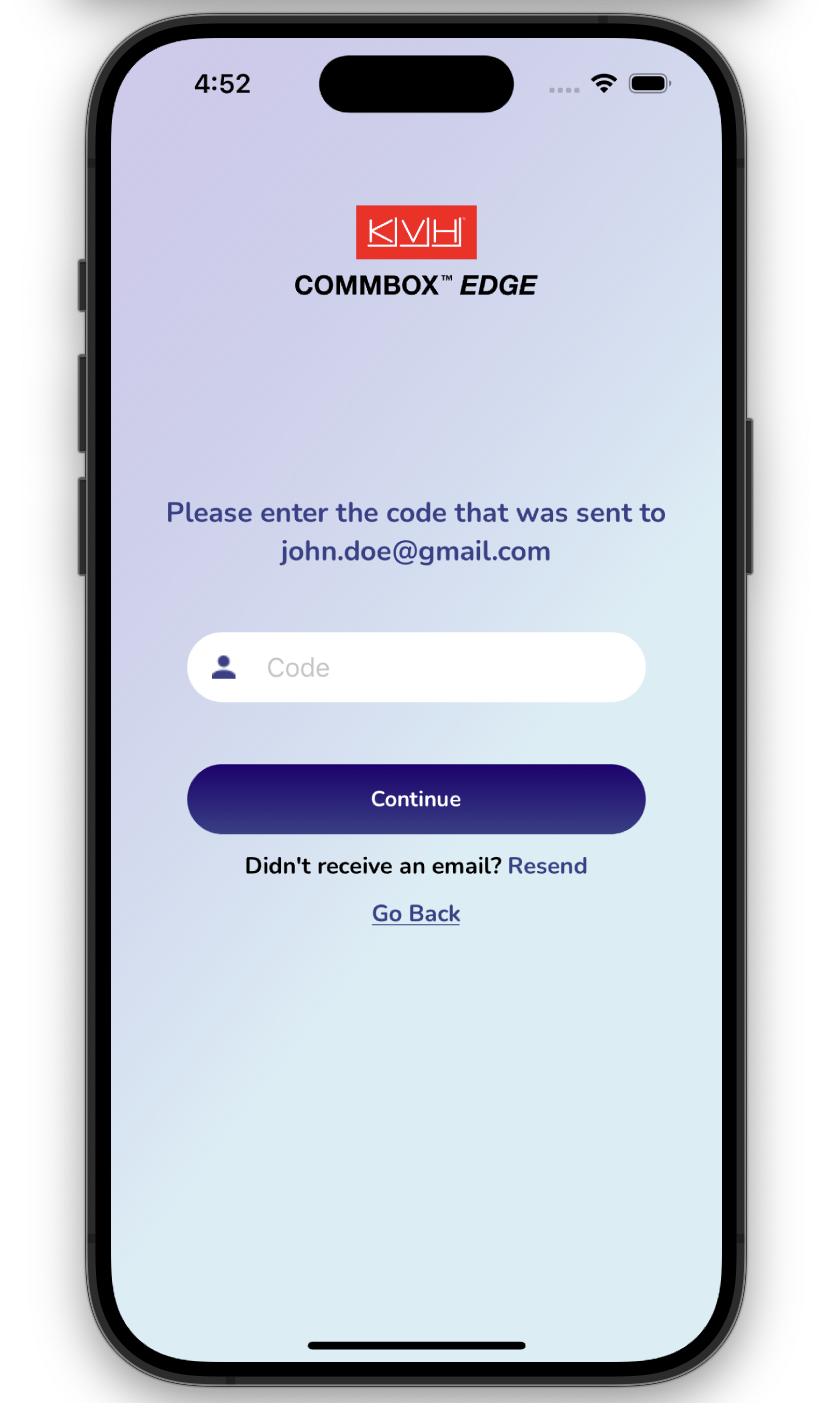
For two-factor authentication (2FA), a verification code is sent to the registered email address. Enter the code to complete the sign-up process.
-
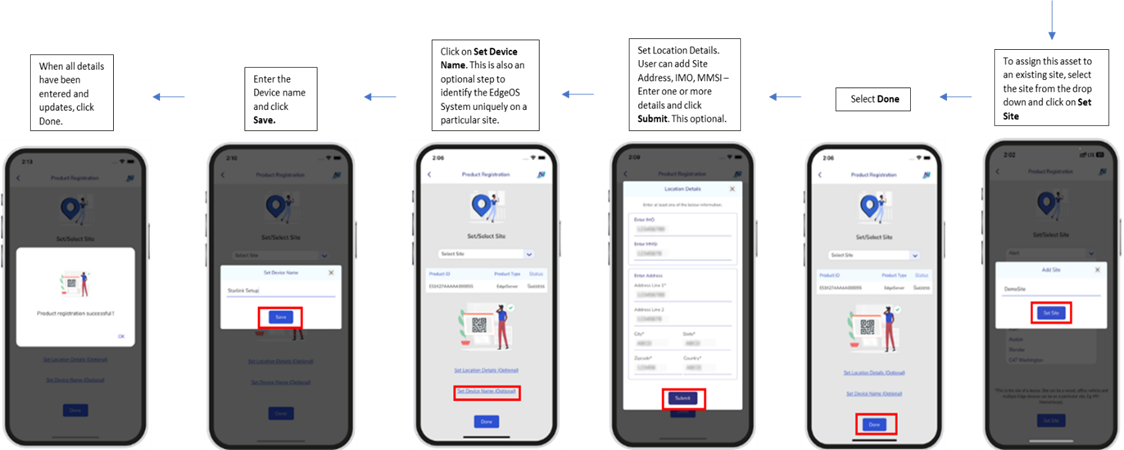
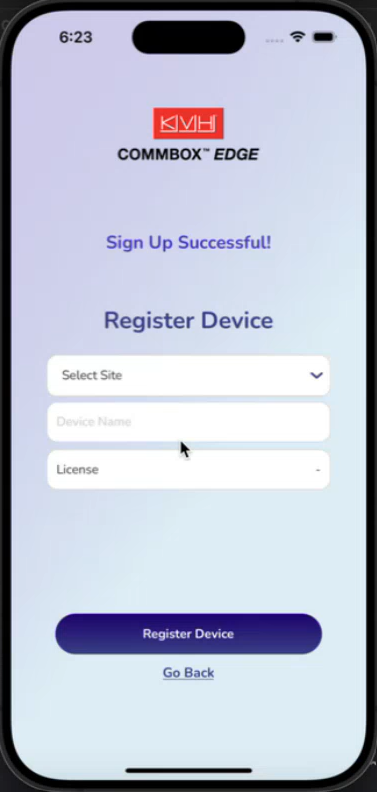
After successfully signing up, the user can now configure the device.
-
Click the Select Site button to choose the site from the dropdown menu to associate with the user account.
-
Click the Add New Site button to add a new site. Enter the site name.
-
Click the Set Site button to to save the site and associate the user.
-
In the Device Name field, enter a name for the device.
-
Select the License Type from the dropdown menu.
-
Click the Register Device button to complete registration.
-
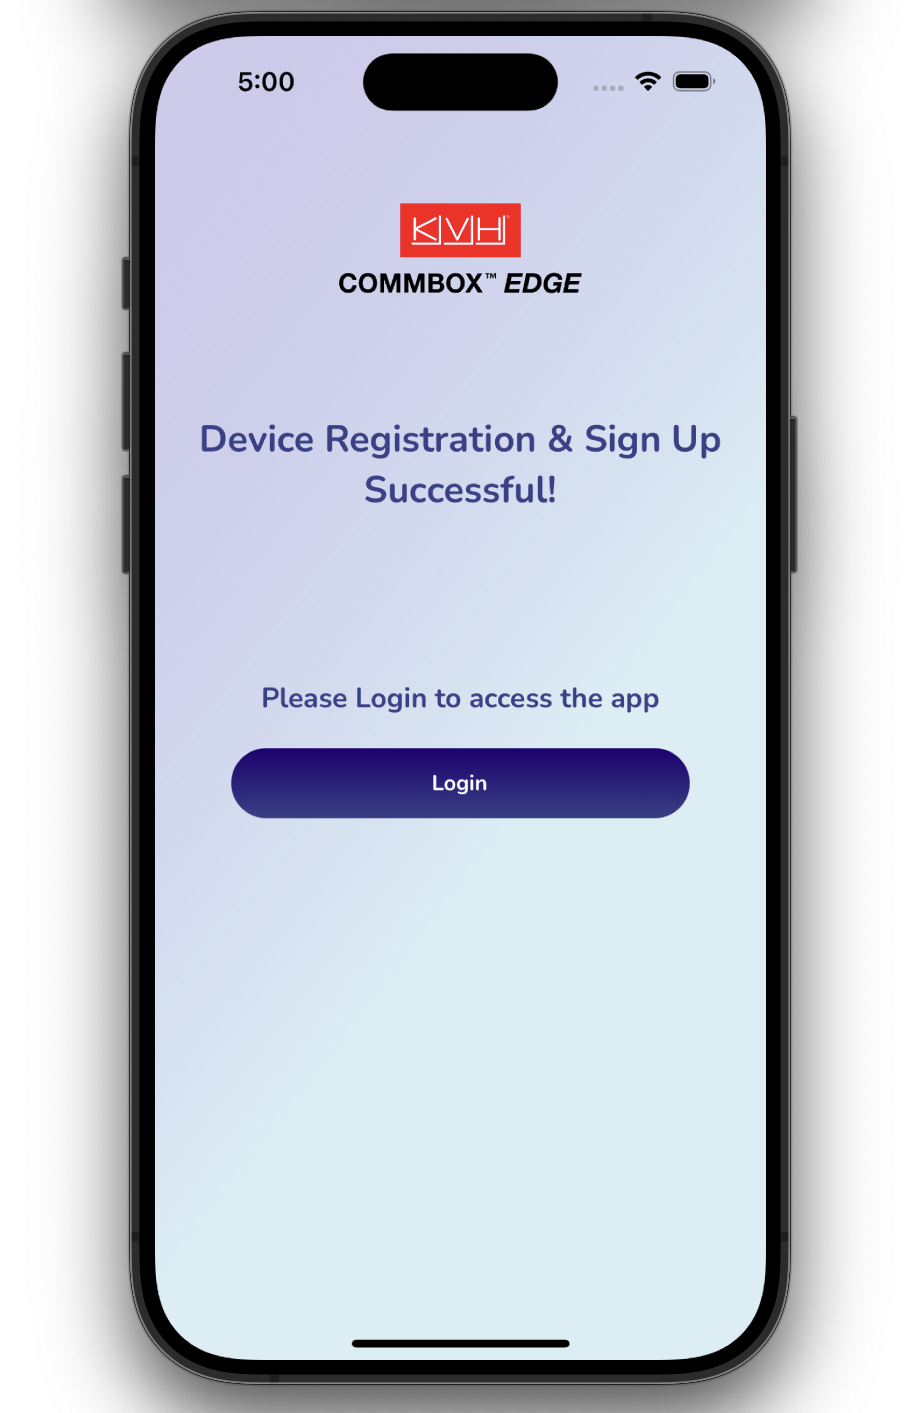
After successful registration and sign-up, return to the login page and sign in using the registered credentials.