VSAT Controller (Starlink)
Configuring Starlink Interface
The steps required to setup the Starlink interface to show in VSAT Controller page are defined here and performed using flow of the Configuration Wizard.
Login into the EpicOS Portal.
Click the icon at the top right corner of the homepage.
Click Configuration Wizard.
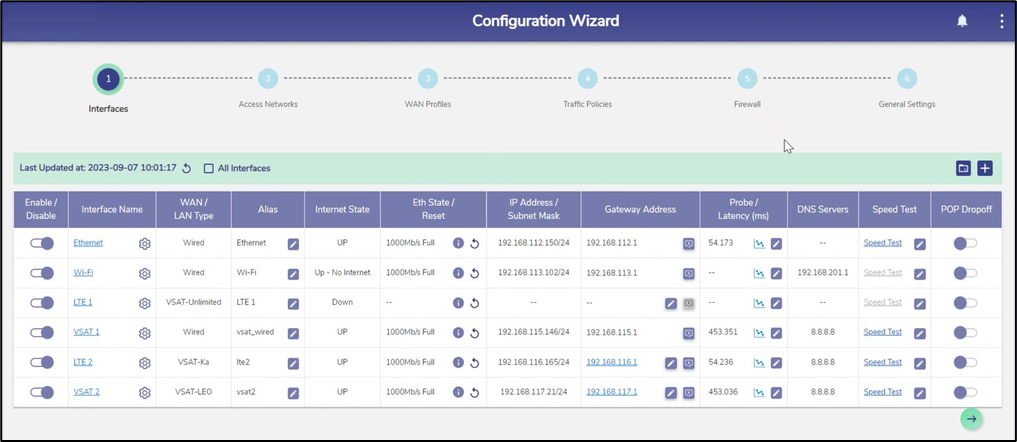
Configuration Wizard
Click Interfaces.
Details of the Interfaces present on the EpicOS System are listed on the Interfaces page. The user can view and update the configuration of the Interfaces present on the EpicOS System.
By default, only enabled Interfaces are shown. To see all the interfaces, check the All Interfaces checkbox.
The user can also press on the Refresh button to refresh the page and get the latest data. By default, this screen refreshes every 30 seconds.
Remove the WAN Interface to be updated from all WAN Profiles.
Click on the Toggle icon and disable the WAN Interface.
Click the Gear icon next to the Interface. The Interface dialog box opens.
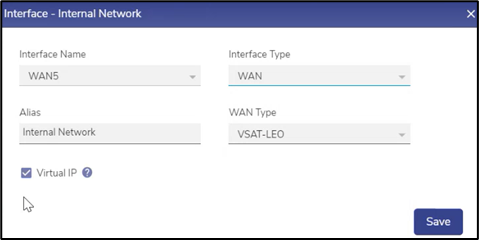
Update WAN Interface
Check the Interface Name.
Select the Interface Type as WAN from the dropdown menu.
Select the WAN Type as VSAT-LEO from the drop down menu.
Enter the Alias Name for the Interface.
Click Save.

Gateway Address
Click the Pencil icon under the Gateway Address column of the selected interface. The VSAT – LEO Type dialog box opens.
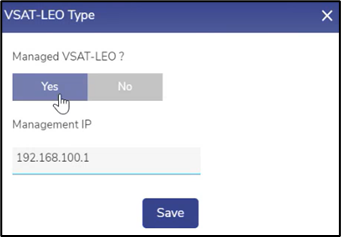
VSAT - LEO Type
Click Yes under the Managed VSAT-LEO? field.
The Management IP is populated by default.
Click Save. Now the data will be fetched from the Starlink Modem and displayed on the VSAT Controller page.
Click on the Toggle icon and enable the WAN Interface.
Click the three dots icon at the top right corner of the homepage.
Click VSAT Controller.
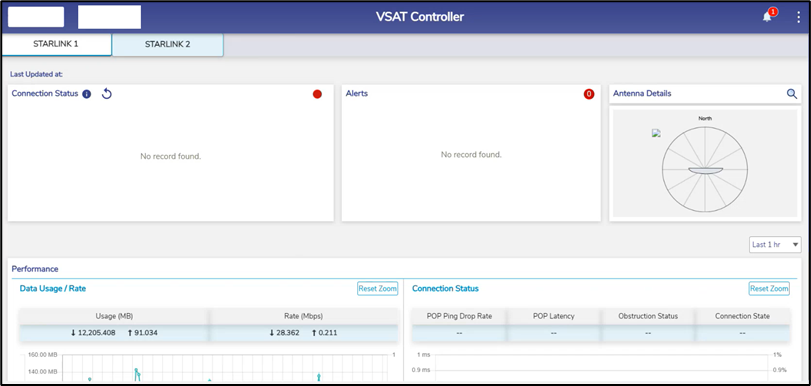
VSAT Controller
The user can view the data received from the Starlink modem in the VSAT Controller page.
Configuring VSAT Interface
The steps required to setup the VSAT interface to show in VSAT Controller page are defined here and performed using flow of the Configuration Wizard.
Login into the EpicOS Portal.
Click the three dots icon at the top right corner of the homepage.
Click Configuration Wizard.
Click Interfaces.
By default, only enabled Interfaces are shown. To see all the interfaces, click the All Interfaces checkbox.
Remove the WAN Interface to be updated from all WAN Profiles.
Click on the Toggle icon and disable the WAN Interface.
Click the Gear icon next to the Interface. The Interface dialog box opens.
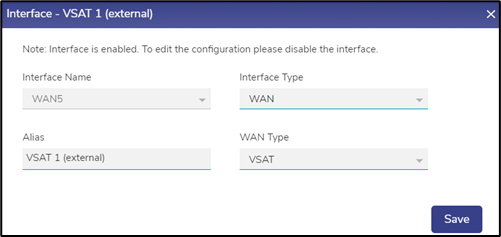
Update VSAT Interface
Check the Interface Name.
Select the Interface Type as WAN from the dropdown menu.
Select the WAN Type as VSAT from the drop down menu.
Enter the Alias Name for the Interface.
Click Save.

Gateway Address
Click the Pencil icon under the Gateway Address column of the selected interface. The VSAT Type dialog box opens.
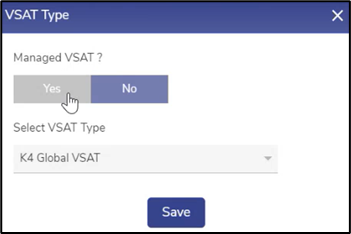
VSAT Type
Click Yes under the Managed VSAT? field.
In the VSAT Type field, select one of the available options from the dropdown menu. The options available are given below:
Global VSAT - Non-Sat-Elite VSAT Provider Single Modem on VSAT1. With this option selected, VSAT controller will show up with all the available data. Beam Switch will not be supported with this configuration.
Sat-Elite Global VSAT - Modem1 (SES) on VSAT1
Sat-Elite HTS VSAT - Modem1 (Hispasat) on VSAT1
Sat-Elite HTS/Global VSAT - Modem1 (SES) & Modem2 (Hispasat) on VSAT1
Note: SES and Hispasat are running two different iDirect platform firmware, hence the need for two modems.
Sat-Elite Global VSAT - Multiple ISPs- Modem1 (SES/Intelsat) on VSAT1
Note: SES and Intelsat configurations are saved in the EpicOS System, and appropriate configuration is loaded on the modem.
Sat-Elite HTS/Global Coverage - Multiple ISPs- Modem1 (SES/Intelsat) and Modem2 (Hispasat) on VSAT1.
Click Save.
Configuring VSAT Management Interface
Click on the Toggle icon and disable the VSAT/MGMT Interface.
Click the Gear icon next to the Interface. The Interface dialog box opens.
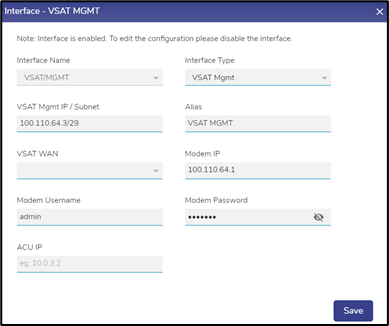
Update VSAT MGMT Interface
Check the Interface Name.
Select the Interface Type as VSAT Mgmt from the dropdown menu.
Enter the Alias Name for the Interface.
In the VSAT WAN field select the corresponding VSAT interface for which this interface acts as the management interface.
Enter the Modem Username and Modem Password.
Click Save.
Click on the Toggle icon and enable the WAN Interface.
Now the data will be fetched and displayed in the VSAT Controller.
